
PTU Pirates Life for Me PTU
Animated
This tutorial was written by me Fairygem on the 20th
March 2016 and is all my own creation and idea. For this tutorial you will need
to have a working knowledge of Paint Shop Pro and Animation Shop working with
layers.
For this tutorial you will need :-
Paint Shop Pro – I am using X5 but any version will work.
Animation Shop – I bought this product when I got X12 but not sure if its
still for sale or free. Google should be able to help you out.
Tube of Choice – I am using the wonderful artwork of Elias Chatzoudis. You
can buy Elias’s amazing artwork HERE
Scrapkit of Choice – I am using a beautiful kit by Ginnibug Designz called
Pirates Life Yoho. This kit is for sale at Picsfordesign HERE. Please remember that
Jenn sells her kits under the name LapisGin at Pfd.
Mask of Choice – I am using Mask 87 by SophisticatSimone. You can find her
wonderful masks HERE
Font of Choice – I am using AR Berkley which came with Psp.
Plugins :-
Xenofex2 – Constellation
Open new image 700x700 white background. We can resize later.
Open Paper 4, Resize by 90%. Load Mask from Disk, Delete and
merge group.
Open Element 11 and Resize by 65%. Copy and Paste as a new
layer moving to where the sea meets the sky on the mask layer.
Open Element 25, Copy and Paste as a new layer and move to
the right hand side near the bottom of the image. Give a drop shadow 2, 3, 25,
and 4.00 Black.
Open Element 31, Copy and Paste as a new layer moving to the
right hand side near the bottom of the image. Give a drop shadow as above.
Open Element 33 and resize by 55%. Copy and Paste as a new
layer and place down from the centre of image. Mirror, Sharpen then drop shadow
4, 6, 25, 4.00 Black.
Open Element 49 and Resize by 65%. Copy and Paste as a new
layer moving down the centre of image. Drop Shadow as above.
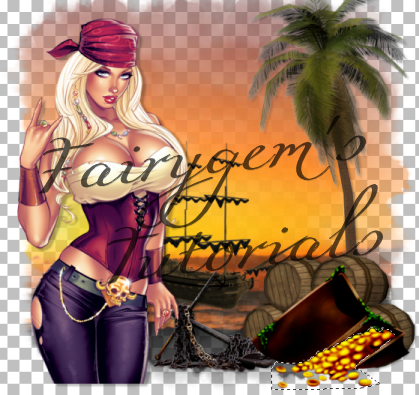
Copy and Paste your tube as a new layer. Move to the left
hand side of image. Drop Shadow as above.
Open Element 53 and Resize by 80%. Copy and paste as a new
layer move over to bottom right. Magic wand freehand point to point. Add
(Shift). Draw around the coins see my tag reference below.
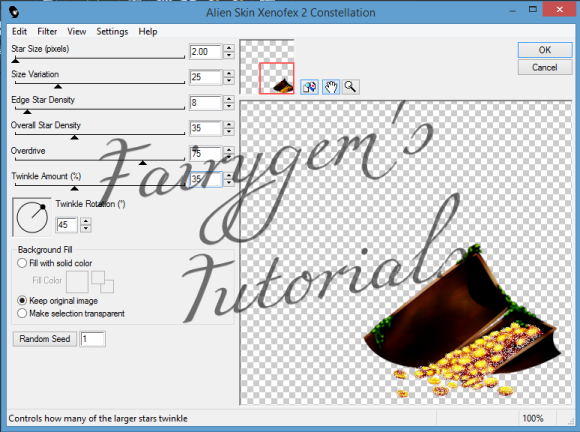
Duplicate twice and Rename 1, 2, 3. On layer 1 go to effects – Xenofex2 – Constellation Settings
Below.
Make Layer 2 active – Effects – Constellation and press Random Seed. Ok
Make Layer 3 active – Effects – Constellation and press Random Seed, Ok Deselect.
Open Element 17 and Resize by 75%. Copy and Paste as a new
layer moving to the left side bottom. Drop Shadow 4, 6, 25, 4.00 Black
Open Element 67 and Resize by 40%. Copy and Paste as a new
layer moving down to left side bottom. Duplicate and move slightly over to the
right. Merge down and give Drop Shadow as above.
Open Element 26 and Resize by 55% then 70%. Copy and Paste as
a new layer move to left side bottom. Sharpen and and give Drop Shadow as above.
Add your copyright and license information.
Add your name using colour #811c49
NOW TO ANIMATE
Close off layers 2 and 3. Copy Merged then over to Animation
Shop and Paste as a new layer.
Back to Psp – Hide Layers 1 and 3 and open 2. Copy Merged then over to
Animation Shop. Click on your image then right click and paste after current
frame.
Back to Psp – Hide Layers 1 and 2 and open 3. Copy Merged then over to
Animation Shop. Click on your image then right click and paste after current
frame.
Go to View Animation and check your animation. If happy Save
as a GIF.
That’s it we are done. I hope you found this tutorial easy to
follow any questions don’t hesitate to inbox me.
I would love to see your results so please feel free to inbox
me and I will get them added to the thread.
Remember my tutorial is only a guideline put your own touches
to it and make it your tag.
Hugs
No comments:
Post a Comment