
PTU Geisha Rose PTU
This tutorial was written by me Fairygem on the 12th
March 2016 and is all my own idea and creation. Any resemblance to other
tutorials is purely coincidental and not intended.
For this tutorial you need to have a working knowledge of
Paint Shop Pro.
You will need:-
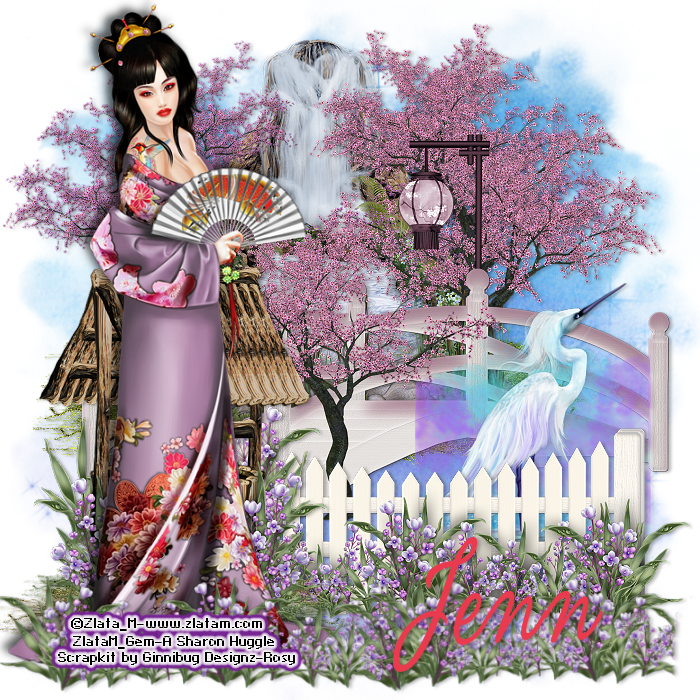
Tube of Choice – I am using a beautiful tube by Zlata_M.
You can buy his tubes HERE. Please only use his artwork with a proper license
to do so.
Scrapkit of Choice – I am using a wonderful kit by Jenn at
Ginnibug Designz called Rosy. You can buy this beautiful kit at Hania Design
HERE or Picsfordesign HERE. Please remember that Jenn’s kits are under Lapis
Gin at PFD.
Mask of Choice – I am using Mask 69 by SophisticatSimone
HERE
Font of Choice – I am using La Portenia de la Boca
No Plugins needed.
Lets begin:-
Open new image 700x700 You can resize later if you so wish
Open Paper 1 and resize by 90%. Copy and Paste as a new
layer. Load Mask from disk Delete and merge as group.
Open Element 25, Copy and Paste as a new layer. Move the
Element slightly up and to the left. Sharpen and give drop shadow 1, 3, 25, 4
and Black.
Open Element 15, Copy and Paste as a new layer. Move
slightly up and over to the right.
Sharpen and give drop shadow of above.
Open Element 53 and resize by 65% twice. Copy and Paste as
a new layer moving over to the right. Sharpen and give drop shadow as above.
Open Element 26, Copy and Paste as a new layer moving over
to the right and down slightly. Sharpen and give drop shadow as above.
Open Element 102 and resize by 65%. Copy and Paste as new
layer moving over to the left. Sharpen and give drop shadow as above.
Open your tube and if using the same as me chose the outfit
you like. Copy and Paste as a new layer and move over to the left. Resize by 82%.
Sharpen and give drop shadow of -4, -6, 65, 13.04 Black.
Open Element 10 and resize by 90%. Copy and Paste as a new
layer. Duplicate and move over to the right. Take your eraser tool and erase
the overhanging part near the side of your canvas. Merge down then sharpen and
give drop shadow, 1, 3, 25, 4 Black.
Add your copyright and license number.
Find your font and write your name using #ea3a4e. Give same
drop shadow as above.
That’s it we are done. I hope you found my tutorial easy to
follow. Any problems feel free to email me. I would also love to see your
results and add them so please email me so I can get them added if you wish to.
Remember my tutorial is a guideline only, add your own
touches to make it yours.
Hugs
No comments:
Post a Comment