Voodoo Witch - Animated
This tutorial was written by me Shaz/Gem on the 27th October 2018 and is all my own idea and creation. Any resemblance to other tutorials is purely coincidental and not intended.
For this tutorial you will need to have a working knowledge of Paint Shop Pro program and layers. Also you need to have a working knowledge of Jasc Animation Shop.
For this tutorial you will need:-
Paint Shop Pro - I am using X5 but any version will work.
Jasc Animation Shop 3 - This is no longer available but you can google and get a free version.
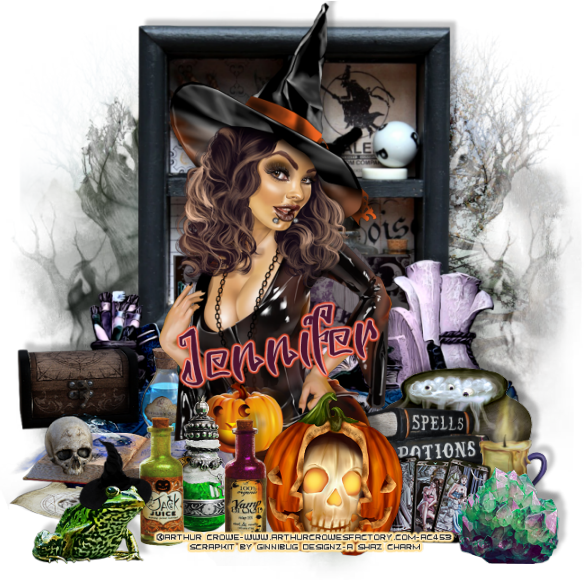
Scrap Kit - I am using a beautiful scrapkit by Jennifer at Ginnibug Designz. The kit is called Voodoo Witch and comes with so many elements, papers and frames plus 5 Masks Wordart and a Tube. Well worth the special price of $1. You can buy this kit at Picsfordesign under the name LapisGin HERE
Tube of Choice - I am using a Stunning Exclusive tube by Misticheskaya called Enchantress. You need to have an Exclusive account to get this tube. You can buy it at Picsfordesign.
Mask of Choice - I am using a beautiful mask by SophisticatSimone called Mask0209-SophisticatSimone. You can get this mask on Simones blog - Scrappy Bit of Fun HERE but need to get it quick. Life isn't too good for her at the moment so she is closing her Blog down in 3 Months. You have to get as much as you can before she closes the blog as her stuff is totally amazing.
Animations - I am using 2 of Simones free animations
SimoneAni_Magic Balls 003
SimoneAni_Bats 002
You can download all Simones free Animations from her blog.
Font of Choice - I am using Nekrokids for name which you can find at Da Fonts, and for the Copyright Pf Tempster five which you can also get at Da Fonts.
Plugins:-
Eyecandy 4000 Gradient Glow
Drop Shadow throughout tutorial - V3, H3, Opacity 45, Blur 6.25 Colour Black.
Open the tube in Psp and minimise for the moment.
Lets begin:-
1. Open New image 700x700.
2. Open Paper 15. Resize by 85%. Copy and Paste onto new image. Layers and Load the mask you are using. Delete mask layer and Merge group.
3. Open Element 101. Resize up by 110%. Copy and Paste moving up. Drop Shadow.
4. Open Element 106. Resize by 90%. Copy and Paste moving left and slightly down. Drop shadow.
5. Open Element 50. Resize by 75%. Copy and Paste moving right. Drop shadow.
6. Open Element 1. Resize by 80%. Copy and Paste moving right and down. Drop Shadow.
7. Maximise your tube layer and choose what layers you wish to be showing. Once happy Copy Merged and paste onto your image. If using the same tube as me Resize by 25%. Move the tube left and down. Once happy give a Drop shadow.
8. Open Element 21. Resize by 85%. Copy and Paste moving left. Drop Shadow. On layer palette move below the tube layer.
9. Open Element 25. Resize by 25%. Copy and Paste moving left and down. Drop shadow.
10. Open Element 35. Resize by 45%. Copy and paste moving left and down. Drop shadow.
11. Open Element 38. Resize by 20%. Copy and Paste moving left and slightly down.
12. Open Element 34. Resize by 20%. Copy and Paste moving slightly left and down.
13. Open Element 27. Resize by 15%. Copy and Paste moving in front of the other 2 bottles.
14. Go back to Element 38 and merge down twice on your layer palette. Drop shadow.
15. Open Element 42. Resize by 25%. Copy and Paste moving slightly right and down. Drop shadow.
16. Open Element 76. Resize by 70%. Copy and Paste moving far right and down. Drop shadow.
17. Open Element 105. Resize by 25%. Copy and Paste moving in front of the book. Drop shadow.
18. Open Element 14. Resize by 25%. Copy and Paste moving far left. Duplicate and move far right. Resize the copy by 90% and merge down. Drop shadow.
19. Layers resize and resize all layers by 90% twice.
20. Add your copyright and license details.
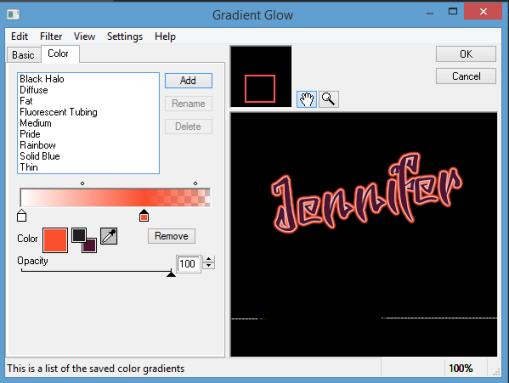
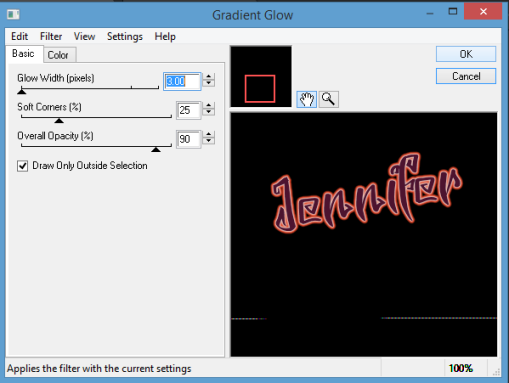
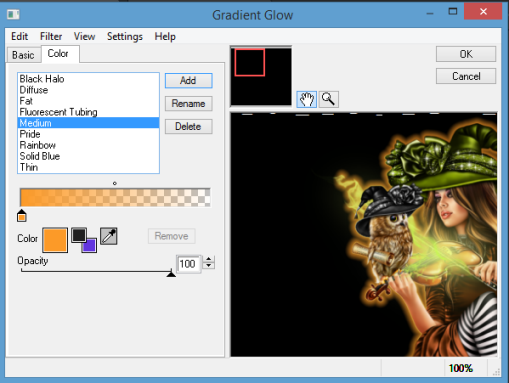
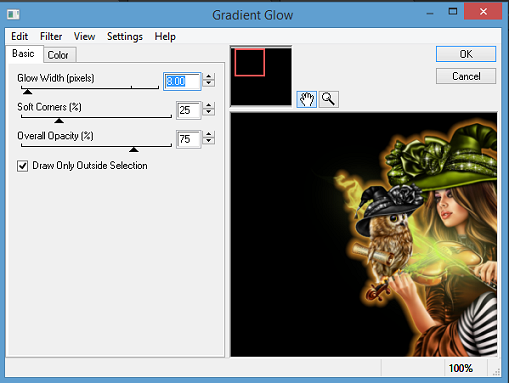
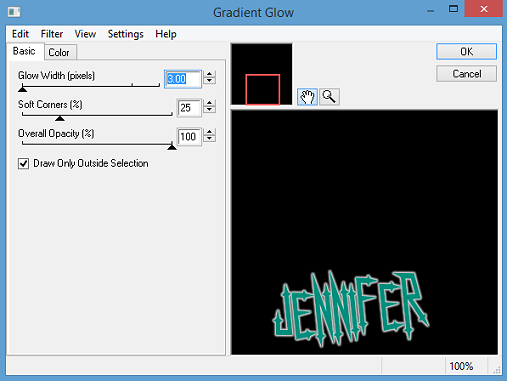
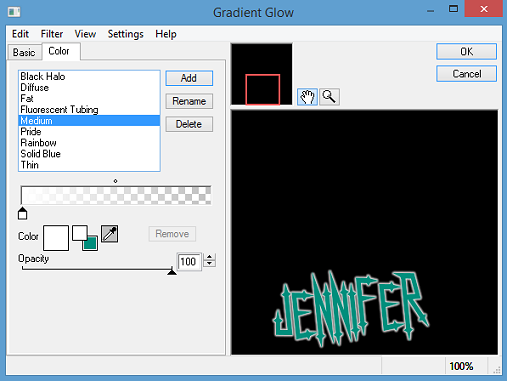
21. Add your name using font and colour #008e7c. Give a gradient glow settings below.
Time to animate.
1. Open your Jasc Animation shop and the two animations by Simone. Resize the Magic Balls by 60% then 85%.
2. In Psp right click on your tag and Copy Merged.
3. In Animation shop right click and Paste as a new Animation.
4. Ctrl and Shift used together and hit the L button 17 times till you have 18 frames.
5. Click on the animation and hit Ctrl A, Ctrl C.
6. Click on your tag image and hit Ctrl A Ctrl E. Move the animation where you would like it, i moved mine so it was sitting in front of the ball. Once happy left click on your mouse to lock animation in.
7. View your animation and if happy Save as a gif.
For the second tag the animation is slightly longer to do but the finished result is well worth it.
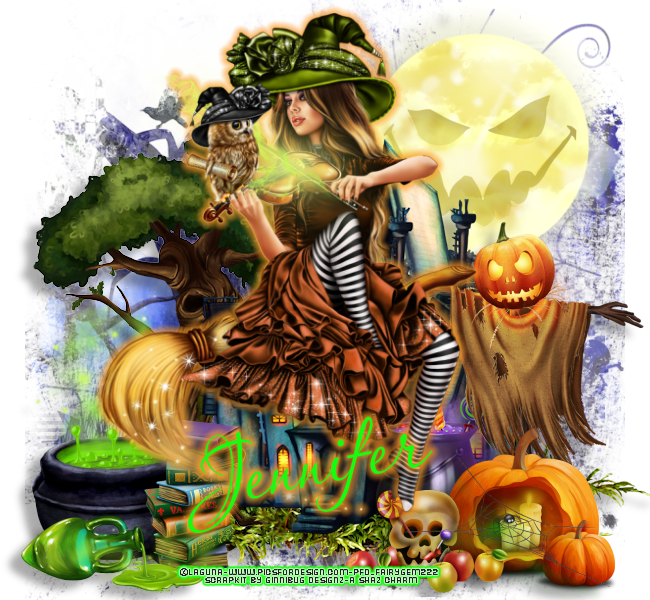
1. On your original image delete the tube layer and copyright details.
2. Open the tube from the kit. Resize by 80%. Copy and Paste moving slightly down. Drop shadow.
3. Add copyright Scrap kit by Ginnibug Designz.
To Animate
1. Close off all layers in your layer palette from the tube up.
2. Right click and Copy Merged. Take over to animation shop and Right click Paste as new Animation.
3. Ctrl Shift and hit L 15 times to give you 16 layers.
4. Resize Simone's Bat 002 animation by 85%.
5. Staying on the animation Ctrl A Ctrl C.
6. Make your image layer active Ctrl A Ctrl E and place the bats where you would like. I placed mine close to the bottom of the tag to make them look like they are coming up from the ground. Once happy left click to lock animation in.
7. Back in Psp, close layers from the light down and open from tube up.
8. Right click Copy Merged, and take back to animation shop. Right click and Paste as new animation.
9. Ctrl Shift and hit L 15 times so you have 16 layers. Ctrl A Ctrl C and click on the original image.
10. Ctrl A Ctrl E and move the layers into place. Once happy left click to lock in place.
11. View your animation and if happy Save as a gif.
Remember when working in animation shop your back arrow comes in handy if you aren't happy with placement ect.
That's it we are done. Sorry for tutorial being a long one but i hope you think the end result is worth it.
I would love to hear your feedback and if you have any questions leave a message and will get back to you asap. Would also love to see end results and add them to this tutorial so if you would like to share email your tags to me and i will get them added.
Hugs
Shaz/Gem
This tutorial was written by me Shaz/Gem on the 27th October 2018 and is all my own idea and creation. Any resemblance to other tutorials is purely coincidental and not intended.
For this tutorial you will need to have a working knowledge of Paint Shop Pro program and layers. Also you need to have a working knowledge of Jasc Animation Shop.
For this tutorial you will need:-
Paint Shop Pro - I am using X5 but any version will work.
Jasc Animation Shop 3 - This is no longer available but you can google and get a free version.
Scrap Kit - I am using a beautiful scrapkit by Jennifer at Ginnibug Designz. The kit is called Voodoo Witch and comes with so many elements, papers and frames plus 5 Masks Wordart and a Tube. Well worth the special price of $1. You can buy this kit at Picsfordesign under the name LapisGin HERE
Tube of Choice - I am using a Stunning Exclusive tube by Misticheskaya called Enchantress. You need to have an Exclusive account to get this tube. You can buy it at Picsfordesign.
Mask of Choice - I am using a beautiful mask by SophisticatSimone called Mask0209-SophisticatSimone. You can get this mask on Simones blog - Scrappy Bit of Fun HERE but need to get it quick. Life isn't too good for her at the moment so she is closing her Blog down in 3 Months. You have to get as much as you can before she closes the blog as her stuff is totally amazing.
Animations - I am using 2 of Simones free animations
SimoneAni_Magic Balls 003
SimoneAni_Bats 002
You can download all Simones free Animations from her blog.
Font of Choice - I am using Nekrokids for name which you can find at Da Fonts, and for the Copyright Pf Tempster five which you can also get at Da Fonts.
Plugins:-
Eyecandy 4000 Gradient Glow
Drop Shadow throughout tutorial - V3, H3, Opacity 45, Blur 6.25 Colour Black.
Open the tube in Psp and minimise for the moment.
Lets begin:-
1. Open New image 700x700.
2. Open Paper 15. Resize by 85%. Copy and Paste onto new image. Layers and Load the mask you are using. Delete mask layer and Merge group.
3. Open Element 101. Resize up by 110%. Copy and Paste moving up. Drop Shadow.
4. Open Element 106. Resize by 90%. Copy and Paste moving left and slightly down. Drop shadow.
5. Open Element 50. Resize by 75%. Copy and Paste moving right. Drop shadow.
6. Open Element 1. Resize by 80%. Copy and Paste moving right and down. Drop Shadow.
7. Maximise your tube layer and choose what layers you wish to be showing. Once happy Copy Merged and paste onto your image. If using the same tube as me Resize by 25%. Move the tube left and down. Once happy give a Drop shadow.
8. Open Element 21. Resize by 85%. Copy and Paste moving left. Drop Shadow. On layer palette move below the tube layer.
9. Open Element 25. Resize by 25%. Copy and Paste moving left and down. Drop shadow.
10. Open Element 35. Resize by 45%. Copy and paste moving left and down. Drop shadow.
11. Open Element 38. Resize by 20%. Copy and Paste moving left and slightly down.
12. Open Element 34. Resize by 20%. Copy and Paste moving slightly left and down.
13. Open Element 27. Resize by 15%. Copy and Paste moving in front of the other 2 bottles.
14. Go back to Element 38 and merge down twice on your layer palette. Drop shadow.
15. Open Element 42. Resize by 25%. Copy and Paste moving slightly right and down. Drop shadow.
16. Open Element 76. Resize by 70%. Copy and Paste moving far right and down. Drop shadow.
17. Open Element 105. Resize by 25%. Copy and Paste moving in front of the book. Drop shadow.
18. Open Element 14. Resize by 25%. Copy and Paste moving far left. Duplicate and move far right. Resize the copy by 90% and merge down. Drop shadow.
19. Layers resize and resize all layers by 90% twice.
20. Add your copyright and license details.
21. Add your name using font and colour #008e7c. Give a gradient glow settings below.
Time to animate.
1. Open your Jasc Animation shop and the two animations by Simone. Resize the Magic Balls by 60% then 85%.
2. In Psp right click on your tag and Copy Merged.
3. In Animation shop right click and Paste as a new Animation.
4. Ctrl and Shift used together and hit the L button 17 times till you have 18 frames.
5. Click on the animation and hit Ctrl A, Ctrl C.
6. Click on your tag image and hit Ctrl A Ctrl E. Move the animation where you would like it, i moved mine so it was sitting in front of the ball. Once happy left click on your mouse to lock animation in.
7. View your animation and if happy Save as a gif.
For the second tag the animation is slightly longer to do but the finished result is well worth it.
1. On your original image delete the tube layer and copyright details.
2. Open the tube from the kit. Resize by 80%. Copy and Paste moving slightly down. Drop shadow.
3. Add copyright Scrap kit by Ginnibug Designz.
To Animate
1. Close off all layers in your layer palette from the tube up.
2. Right click and Copy Merged. Take over to animation shop and Right click Paste as new Animation.
3. Ctrl Shift and hit L 15 times to give you 16 layers.
4. Resize Simone's Bat 002 animation by 85%.
5. Staying on the animation Ctrl A Ctrl C.
6. Make your image layer active Ctrl A Ctrl E and place the bats where you would like. I placed mine close to the bottom of the tag to make them look like they are coming up from the ground. Once happy left click to lock animation in.
7. Back in Psp, close layers from the light down and open from tube up.
8. Right click Copy Merged, and take back to animation shop. Right click and Paste as new animation.
9. Ctrl Shift and hit L 15 times so you have 16 layers. Ctrl A Ctrl C and click on the original image.
10. Ctrl A Ctrl E and move the layers into place. Once happy left click to lock in place.
11. View your animation and if happy Save as a gif.
Remember when working in animation shop your back arrow comes in handy if you aren't happy with placement ect.
That's it we are done. Sorry for tutorial being a long one but i hope you think the end result is worth it.
I would love to hear your feedback and if you have any questions leave a message and will get back to you asap. Would also love to see end results and add them to this tutorial so if you would like to share email your tags to me and i will get them added.
Hugs
Shaz/Gem