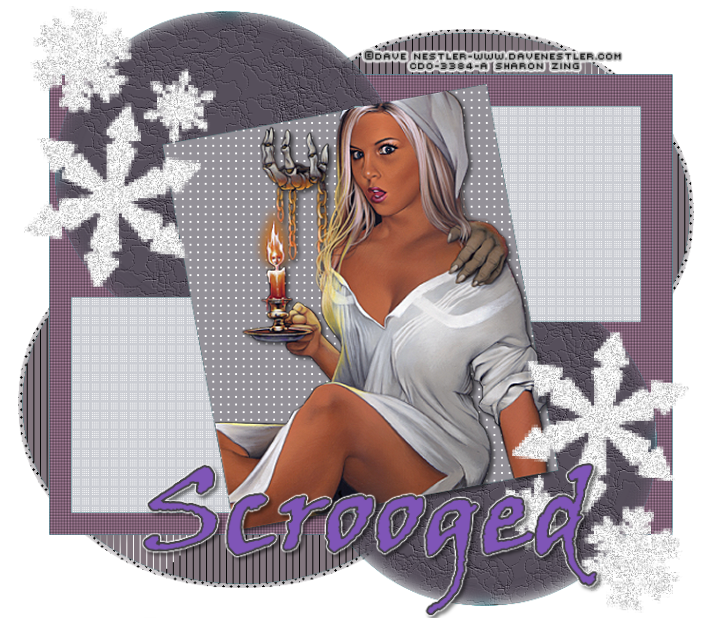
Deck
The Halls
This
tutorial was written by me Fairygem on the 5th December 2013 and is
all my own idea. Any resemblance to other tutorials is purely co-incidental and
not intended.
For
this tutorial you will need:-
Paint shop pro – I am
using PspX5 but any one will work the same.
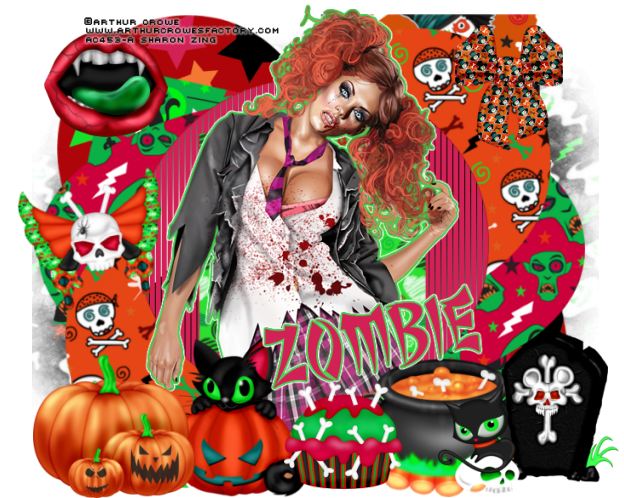
A Tube of Choice – I am
using the awesome artwork of Arthur Crowe you must have a license to use his work. You can find him HERE
Scrapkit of Choice – I
am using Pink Xmas by TracyF.Designz. This is FTU and you can get it HERE
Mask of Choice – I am
using Mask 103 by Gems Which you can get HERE
My Deck the Halls
Template which you can download from HERE
Font of Choice – I am
using Aquarelle which you can get HERE
Plugins – Eye Candy 4
Glass – Default settings
Eye Candy 4 Gradient
Glow
Ok lets begin:-
1.
Open
my template, shift D and delete the original. Delete the TOU layer.
2.
Open
Paper 26 from the scrapkit and copy paste as a new layer at the bottom of the
layers.
3.
Go
to Layers Load mask from disc, delete mask layer merge group. Resize by 105%
then duplicate twice to make the mask layer darker.
4.
Merge
the two rectangle layers together, select float, defloat. Open paper 6, copy
and paste as a new layer. Resize paper by 125%. Invert and delete the overhanging paper.
Delete the original layer.
5.
Merge
the two circles together select float, defloat. Open Paper 28, copy and paste
as a new layer. Resize the paper by 125%. Invert and delete the overhanging
paper. Delete the original layer.
6.
Select
the oval, select float, defloat. Open Paper 2, copy and paste as a new layer.
Resize the paper by 125%. Invert and delete the overhanging paper. Delete the
original layer.
7.
Merge
the two small ovals together, select float, defloat. Open Paper 18, copy and
paste as a new layer. Resize the paper by 110%. Invert and delete the
overhanging paper. Delete the original layer.
8.
Merge
the two squares together, select float, defloat. Open Paper 15, Copy and paste
as a new layer. Invert and delete the overhanging paper. Delete the original
layer.
9.
Select
the large rectangle, select float, defloat. Open Paper 4, Copy and paste as a
new layer. Resize the paper by 125%. Invert and delete the overhanging paper.
Delete the original layer.
10. Select the left side
frame background, select float, defloat. Open Paper 16, copy and paste as a new
layer moving so that its in your frame. Invert and delete the overhanging
paper. Keep selected.
11. Highlight your tube
close up, copy and paste onto your working layer as a new layer, move to where
you like it and resize if needed I resized by 75%. Delete the overhanging tube.
Deselect.
12. Change the blend mode
to Hard light and the opacity down to 65%.
13. Select the right side
frame background and follow instructions 10 and 11, only mirroring your tube
close up.
14. Merge together the two frames, select float,
defloat. Add a new layer and flood fill with a silver gradient or pattern. I
used a pattern I have had for a long time and would share but I can’t remember
where I got it.
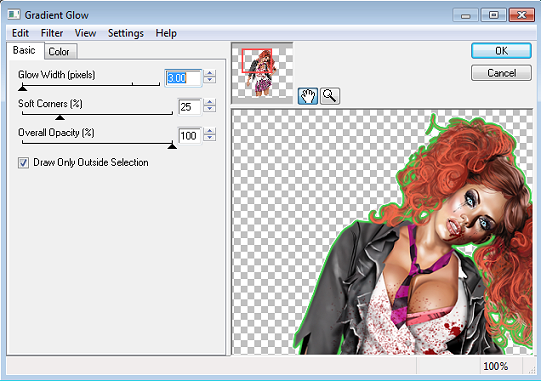
15. Effects plugins Eye
Candy 4 Glass with the default settings but making sure the colour is changed
to white.
16. Highlight the wordart
background layer, select float defloat. Add a new layer and flood fill with
your silver pattern or gradient. Add a dropshadow of 2, 2, 50 and 5. Deselect
and delete the original layer.
17. Highlight the Wordart
layer, select float defloat. Flood fill with a colour from your tube, I used
#680633. Make sure you flood fill the original layer as that way you get the
pretty sprig on your finished result.
18. Add your main tube and
place in the middle of the two frames below the word art layers. Resize by 70%
then 85% if using the same tube as me. Add a dropshadow to your tube I used -2,
2, 40 and 3.
19. Start adding your
elements to the tag and placing where you think it best or see my tag for
placement.
I used
Skates 1
Snowman
Tree 1
Snowflake 3
Bauble 3
Remember when resizing
sharpen the element when finished.
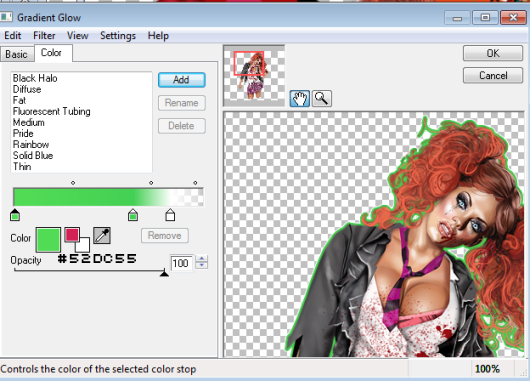
20. Add your copyright and
license if needed then add your name, I used a gradient glow on my name of 3 25
and 100 fat setting. Save your tag as a png.
That’s it we’re done
hope you found this easy to follow remember my tutorial is only a guide line
put your own touches to the tag to make it yours.
Hugs
Sharon/Gem