
SteamPunk Valentine

This tutorial was written by me Fairygem on the 18th January 2013, any resemblance to another tutorial is purely coincidental and not intended. You will need to have a working knowledge of using Paint Shop Pro and working with layers.
For this tutorial you will need:-
Paint Shop Pro - I am using Psp9 but this will work with any program.
Tube of Choice or the one i am using by Joel Adams which you can get HERE. Please make sure you have the proper license to use his artwork.
Scrapkit of choice or the one i am using by Doris over at Scrap Dimensions called Steampunk Valentine. You can get the kit HERE.
My Template which you can download HERE.
Mask of choice or the one i am using by Cat over at Insatiable Dreams Mask 567 which you can get HERE
Plugins:-
Xero Porcelain
Eyecandy 5 Impact Gradient Glow and Glass
Ok lets Begin.
1. Open my template and Shift D. Delete the original.
2. Open Paper 6 and Resize by 75%. Copy and Paste as a new layer. Move it to the bottom of template.
3. Layers, Load Mask from Disk. Find Mask 567, load and delete the mask layer. Merge group.
4. Highlight the Splat layer, Selections float, defloat. Open Paper 10 and resize by 85%. Copy and paste as a new layer, Inverts Delete. Delete the original layer.
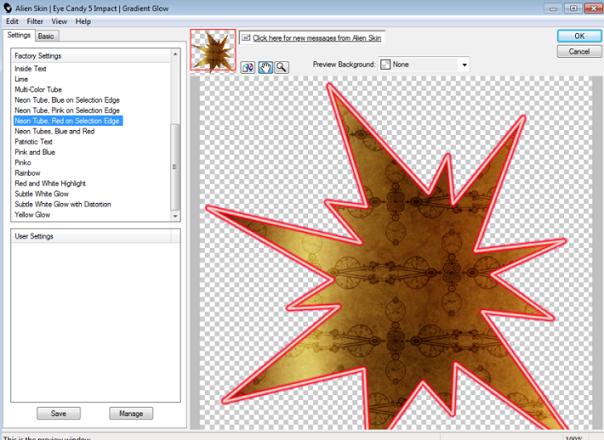
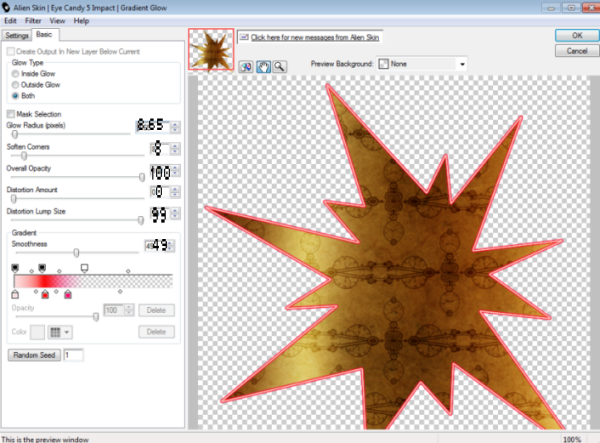
5. Effects, Plugins Eyecandy 5 Impact Gradient glow with the settings below.
6. Highlight the rectangle layer, selections float, defloat. Open Paper 3 and resize by 85%. Copy and paste as a new layer, Invert delete. Delete the original layer. Give it a gradient glow previously used.
7. Highlight the Oval layer, selections float, defloat. Open Paper 8 and resize by 85% twice. Copy and paste as a new layer, Invert delete. Delete the original layer. Add the Gradient glow.
8. Highlight the Frame background layer, Selections float, defloat. Open Paper 2 and resize by 85% twice. Copy and paste as a new layer, Invert Delete. Delete the original layer. Don't Deselect.
9. Open your tube, Copy and Paste as a new layer and place what part of the tube you want into the frame. Change the blendmode to Hard Light.
10. Highlight the frame layer, selections float, defloat add a new layer and floodfill with #9d505c. Delete the original layer.
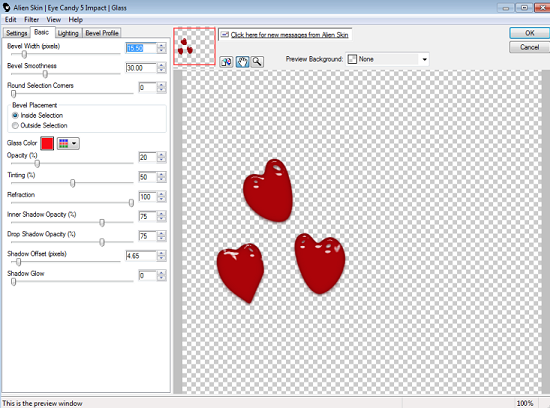
11. Highlight the Hearts layer, selections float, defloat. Add a new layer and floodfill with #9d505c. Delete the original layer. Eye candy Impact Glass settings with the settings below. Add a dropshadow of 2,2,50 and 5.
12. Highlight the Gears layer and give it the gradient glow previously used. Give the same dropshadow.
13. Highlight the Wordart background, selections float, defloat. Add a new layer and floodfill with #600207. Adjust Add/Remove noise Randon, Monochrome ticked 65%. Add the Gradient glow and Dropshadow.
14. Leave the Wordart with the Chrome effect or if you wish to change it to whatever you think would love good.
15. Add your tube behind the wordart to the left side of the tag. Give it the same dropshadow previously used.
16. Open the Bow 2 element. Resize by 30%, copy and paste and place on the left side of the Frame. Add dropshadow.
17. Open the Heart 2 element, resize by 25%, copy and paste as a new layer placing on the frame at the right side. Add dropshadow.
18. Open the Rose 2 element, resize by 35%, copy and paste placing on the right side of the frame at the bottom. Make sure you place it under the wordart. Add dropshadow.
19. Open the Rose 1 element, resize by 30%, copy and paste placing it next to the other rose. Add Dropshadow.
20. Add your name and copyright and Save as a png.
Thats it we're done
Hope you enjoyed my tutorial if you have any questions don't hesitate to ask.
Hugs
Gem xx
No comments:
Post a Comment