Pages

Monday, 5 April 2021

Beautiful Kit by Ginnibug Designz - The Traveler

 The Traveler


This beautiful kit is by Jennifer at Ginnibug Designz.

You can buy this kit at All That Glitterz Store - HERE

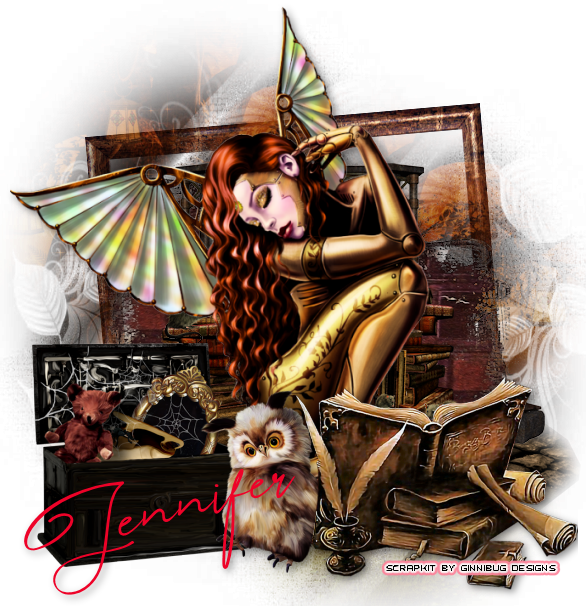
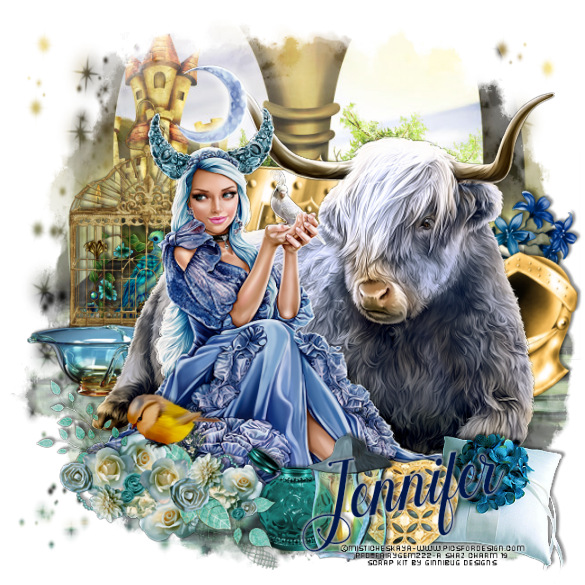
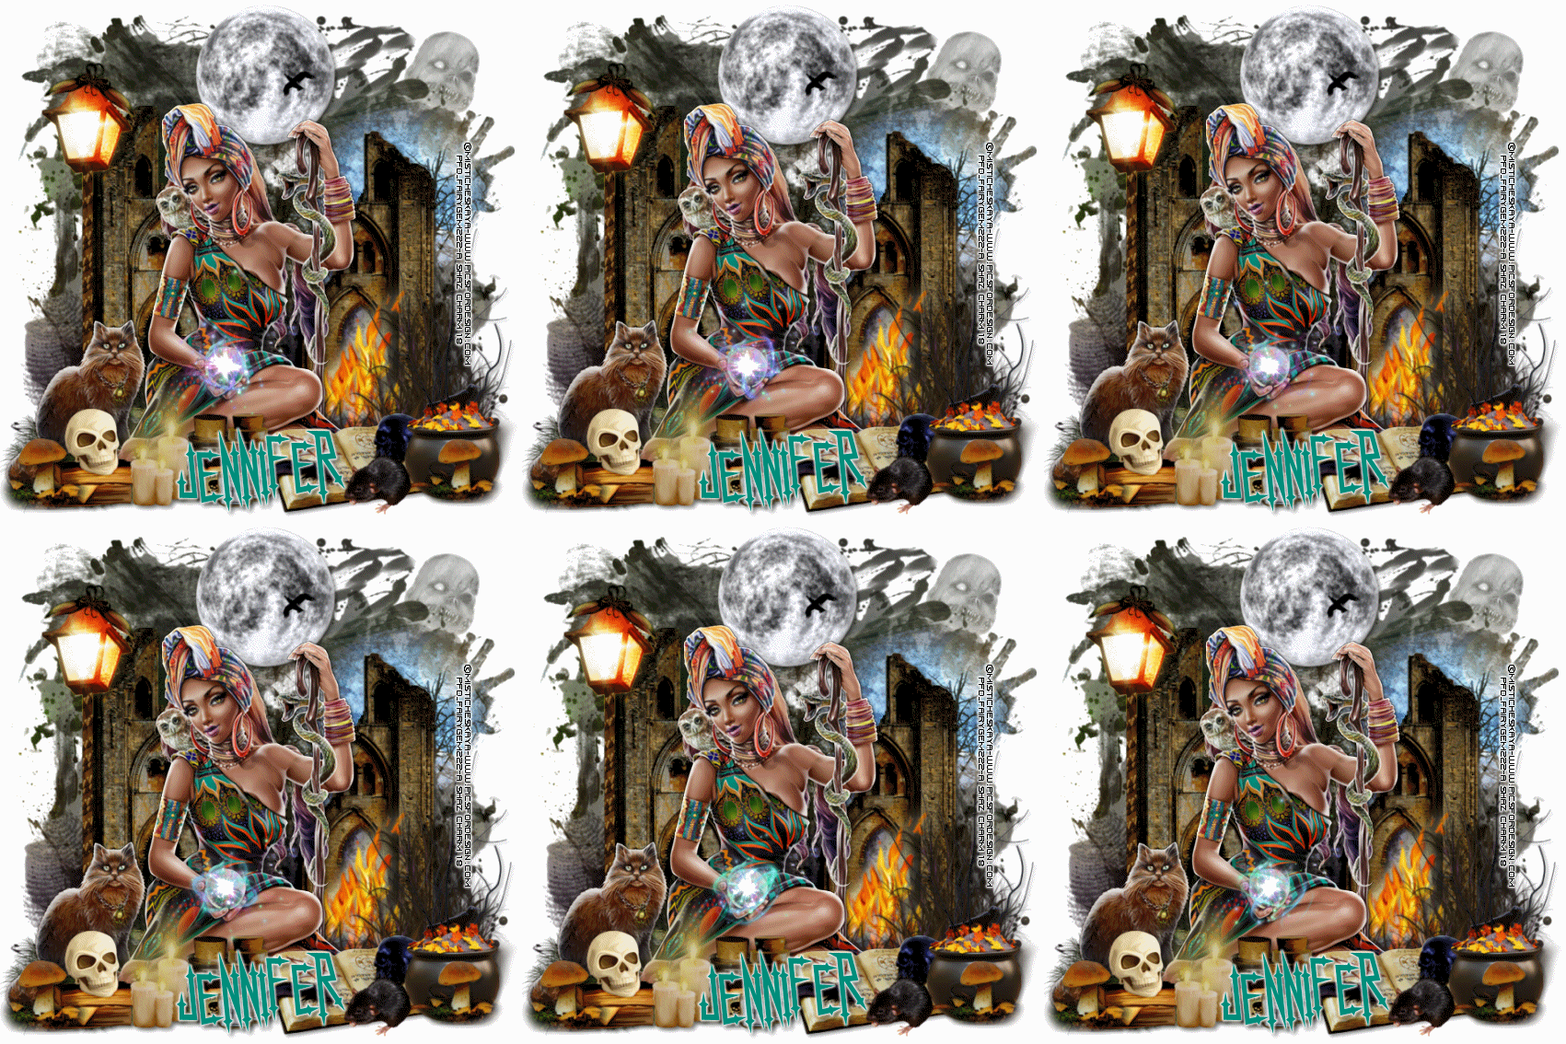
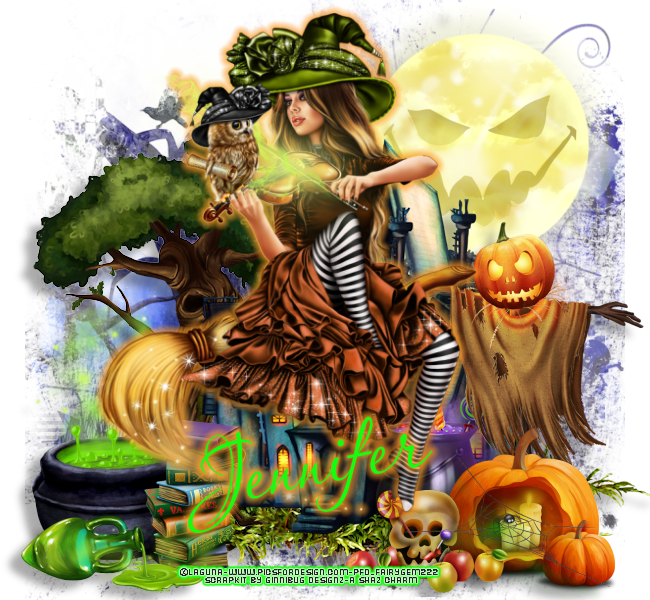
The kit itself is full of so much scope as you can see by my two very different tags.

There are 94 Elements

6 Frames

10 Papers and

1 Wordart.

My two tags are using the wonderful artwork of Lorri Kajenna which you can buy at Picsfordesign - HERE


Stay safe everyone
Hugs
ForeverShaz/Gem


Friday, 15 May 2020

PTU Stay Safe - Keep Well PTU

PTU  Stay Safe Keep Well  PTU

jenniferstaysafe

As we go into another 3 weeks of Lockdown during this Covid 19 Virus, I wanted to share this tutorial with the most important message to all My family and friends and those that visit my blog.
I hope and pray that we all stay safe and keep well and our governments finally find a cure for this virus.
Please please stay safe everyone.

So this tutorial was written by me Shaz/fairygem on the 15th May 2020 and is all my own idea and creation. Any resemblance to other tutorials is purely coincidental and not intended.

For this tutorial you will need:-

Scrapkit - I am using a new kit by Jennifer at Ginnibug Designs called Hello Spring. This wonderful kit comes full of the beauty of spring. You can buy this kit at Picsfordesign under the name LapisGin - HERE
Tube of Choice - I am using a beautifully cute tube by Laguna called My Furry Doctor - You can buy this tube at Picsfordesign - HERE
Mask of Choice - I am using Mask 157 by Insatible Dreams. Sadly Cats site is no longer available so if you don't have the mask use one that is similar to it.
Font of Choice - I used Dayland for the Wordart HERE and Alista Script for the Name HERE
Wordart by Me - Right click and save as
Pink:-
Wordart-staysafe-Gem20a
Gold:-
Wordart-staysafe-Gem20
Lets Begin:-

1. New Image 700x700
2. Open Paper 3, Resize by 90%. Copy and paste as a New Layer.
3. Layers Load Mask and find the mask you wish to use. Delete mask Layer and merge group.
4. Open Element 43. Copy and Paste moving slightly up. Dropshadow V3 H3 Opa 45 Blur 11.22 Black. This dropshadow will be used throughout the tutorial.
5. Open Element 13, Resize by 75%. Copy and paste moving slightly up. D/S
6. Open Element 3, Resize by 75%. Copy and paste moving far right. D/S
7. Open Element 12, Resize by 85%. Copy and paste moving far left. D/S
8. Open tube and if using the same as me open all layers you wish to use. Resize by 40%. Copy and paste moving slightly right. D/S
9. Open Element 52, Resize by 85%. Copy and paste moving down and left. D/S
10. Open Element 69, Resize by 65% then 85%. Copy and paste moving down and right. D/S
11. Open my wordart. Choose which colour you wish to use, I used the Pink one. Copy and paste moving down to the bottom of tube. D/S
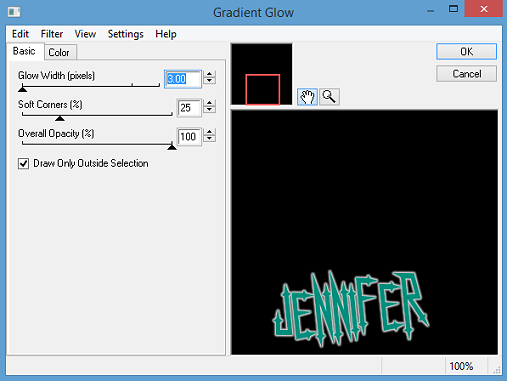
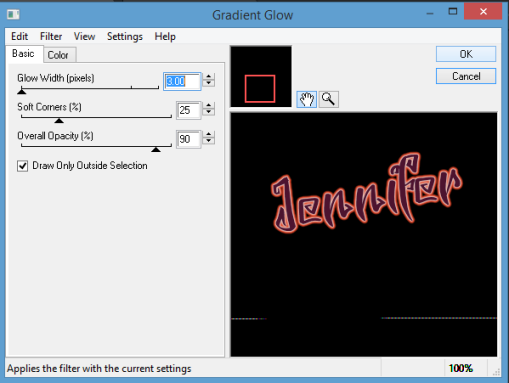
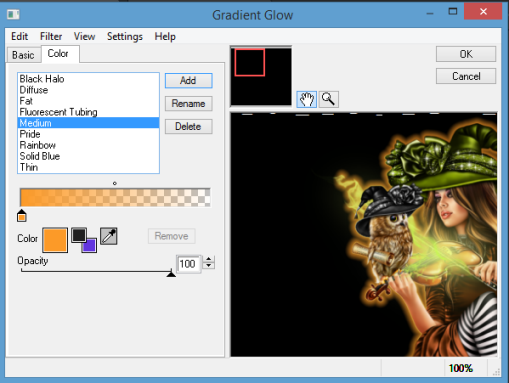
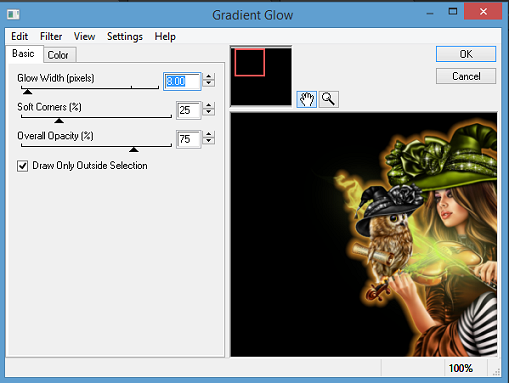
12. Using Alista script and colour #c6044c and add your name. I gave mine a slight gradient glow aswell. Add D/S
Save as a PNG

Thats it short and sweet. Hope you found the tutorial easy to follow. Remember though this is just a guideline, make the tag your own and add any other elements you wish to use.
Any questions or queries just ask.
Hugs
fairysignature

Saturday, 4 April 2020

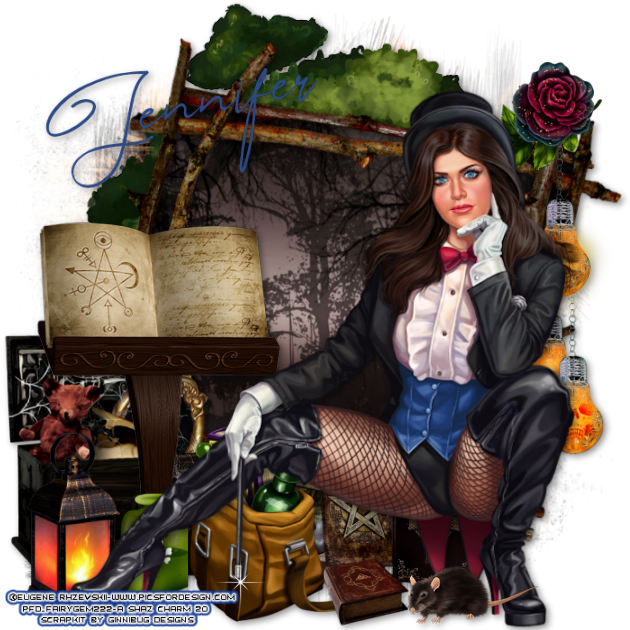
PTU Magic Gretel PTU

Magic Gretel


This tutorial was written by me Shaz/fairygem on the 4th April 2020 and is all my own idea and creation. Any resemblance to other tutorials is purely coincidental and not intended. You will need to have a working knowledge of Paint Shop Pro for this tutorial.

You will need:-
Paint Shop Pro - I am using X5 but any version will work.
Scrapkit - I am using a new beautiful kit by Jennifer at Ginnibug Design called Gretel Punk. This kit has 78 Elements, 6 Frames, 2 Masks, 8 Papers, 3 Clusters and 1 tube. You can buy this kit at Picsfordesign under the name LapisGin Here
Tube of choice - I am using a beautiful tube by Eugene Rzhevskii called Magician Girl at Picsfordesign. This tube is in the Exclusive club so you need to have the proper license to use it. You can get the tube Here
Mask of choice - I used Mask 1 from Jenns Kit.
Font of choice - I am using Angers Script which you can download Here
No outside plugins were used.

Lets begin:-

1. Open New image 700 x 700 transparent checked.
2. Open Mask 1 from the kit. Copy and Paste as a new layer. Resize by 105% make sure all layers are unchecked.
3. Open Element 9. Copy and paste moving slightly up. Dropshadow V3 H3 Opa 45 Blur 11.22 black. This is the dropshadow for the whole tutorial unless otherwise stated.
4. Open Frame 5. Copy and paste as a new layer. Image free rotate 12 right. 
5. Make your freehand tool active, Point to point and draw around the outer branches of the frame. Right click to get your marching ants.
6. Open Paper 4, resize by 80%. Copy and paste moving the paper to what you wish to show. Invert and delete the overhanging. Selections None. On the layer palette move paper under the frame then give frame Dropshadow as above.
7. Open Element 16, resize by 65%. Copy and paste moving down and far left. d/s as above
8. Open Element 21, resize by 65%. Copy and paste placing in front of Element 16. d/s as above.
9. Open Element 17, resize by 60%. Copy and paste moving to top right of frame. d/s as above.
10. Open Element 60, resize by 25% and mirror. Copy and paste moving to top right side of frame. d/s as above
11. Open Element 62, resize by 30%. Copy and paste moving down and left. d/s as above.
12. Open Element 71, resize by 60%. Copy and paste moving down and left. d/s
13. Open Element 15, resize by 35%. Copy and paste moving down and slightly left. d/s
14. Open Element 25, resize by 35%. Copy and paste moving down and slightly right. d/s
15. Open your tube and Copy and paste. Resize by 55% and move to the bottom of your image (see mine for placement). d/s
16. Add a new Raster layer. Click on brushes and find a single sparkle brush (deviantart has some lovely brushes). Change your colour palette foreground to white #ffffff. With your brush place at the end of the wand and left click about 3 times to make the sparkle stand out.
17. Open Element 36, resize by 20%. Copy and paste moving to under the tubes legs. d/s
18. Add name using #2b4a87. d.s
19. Add the relevant copyright and license details to the tag.
Save as a png.

I also did a tag using Cluster 1, the tube from the kit and some of the Elements.

Remember this tag is yours to make your own. Add any other elements you see fit. I hope you enjoyed my tutorial and found it easy to follow. Any questions please don't hesitate to ask.

Hugs
fairysignature

Wednesday, 19 June 2019

PTU Your Moojesty PTU

Your Moojesty
jennifermoojesty/
This tutorial was written by me Shaz/fairygem on the 19th June 2019 and is all my own idea and creation. Any resemblance to other tutorials is purely coincidental and not intended. For this tutorial you will need to have a working knowledge of Paint Shop Pro.

You will need:-
Paint Shop Pro program - I am using X5 but any version will work.
Scrap kit of choice - I am using a wonderful kit by Jennifer at Ginnibug Designs called Your Majesty. This kit has 120 Elements 12 Frames and 24 Papers. You can buy this kit at Picsfordesign.com under the name LapisGin. Here
Tube of Choice - I am using a wonderful tube by Misticheskaya called Nelly. This tube is from the Exclusive club at Picsfordesign so you need to have the license to use this tube.
You can buy it Here
Mask of choice - I am using Mask 89 by Sophistocat Simone. You can find this mask on her blog Scrappy bit of Fun Here
Font of choice - I am using a font called Chalisa Octavia. You can download this font from Here.

 Lets begin

1. Open new Image 650x650 transparent.
2. Open Paper 11 from the kit. Copy and Paste as new layer. Layers load mask 89. Delete Mask layer and merge group.
3. Open Element 2. Resize by 55%. Copy and Paste moving left. Drop shadow V-2 H3 Opa 45 and Blur 3.43.
4. Open Element 82. Resize by 50% then 80%. Copy and Paste moving to the front of the cage. Erase any over hanging. On layer palette move below cage layer. Sharpen and Drop shadow.
5. Open Element 19. Resize by 55% then 80%. Mirror then Copy and Paste moving right. Sharpen and Drop shadow.
6. Open Element 30. Resize by 65% x 2. Copy and paste moving slightly up. Image free rotate by 12% right.
7. Open Element 23. Resize by 45% then 80%. Copy and paste moving far left. Sharpen and drop shadow.
8. Open Element 50. Resize by 45% then 75%. Copy and paste moving far right.
9. Open tube and find what colours you would like to use. Copy merged and paste as a new layer. Resize by 35% then 90%. Mirror, position where you want. Sharpen and drop shadow.
10. Open Element 31. Resize by 30% then 70%. Copy and paste moving down and slightly left. Sharpen and Drop shadow.
11. Open Element 34. Resize by 60%. Copy and paste moving down and far left. Sharpen and drop shadow.
12. Open Element 43. Resize by 40% then 75%. Copy and paste moving down and far right. Sharpen and drop shadow.
13. Open Element 47. Resize by 45% then 65%. Copy and paste moving down and slightly right. Sharpen and drop shadow.
14. Open Element 54. Resize by 35% then 70%. Copy and paste moving down. Sharpen and drop shadow.
15. Open Element 53. Resize by 30% then 80%. Copy and paste placing on top of the flowers. Sharpen and drop shadow.
16. Add your copyright and license details using a pixel font.
17. Add your name using Chalisa Octavia and colour #00174a. Give a slight gradient glow and drop shadow.
Save as a png.

That's it we are done. I hope you found this tutorial easy to follow. Any questions don't hesitate to ask.
Hugs
Shaz/Gem

Sunday, 19 May 2019

Cupcake Queen Set

Cupcake Queen Forum Set

I made this set using my template, the wonderful designer Jenn from Ginnibug Designs and the art of Alehandra Vanhek.
This wonderful kit Cupcake Cutie is full of 85 wonderfully cute elements and 24 colourful papers. 
You can buy this kit at Pics for Design Here under the name LapisGin.
cupcakequeenav
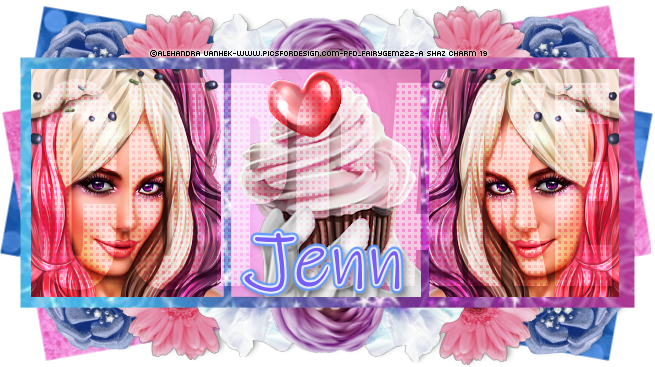
cupcakequeenfs
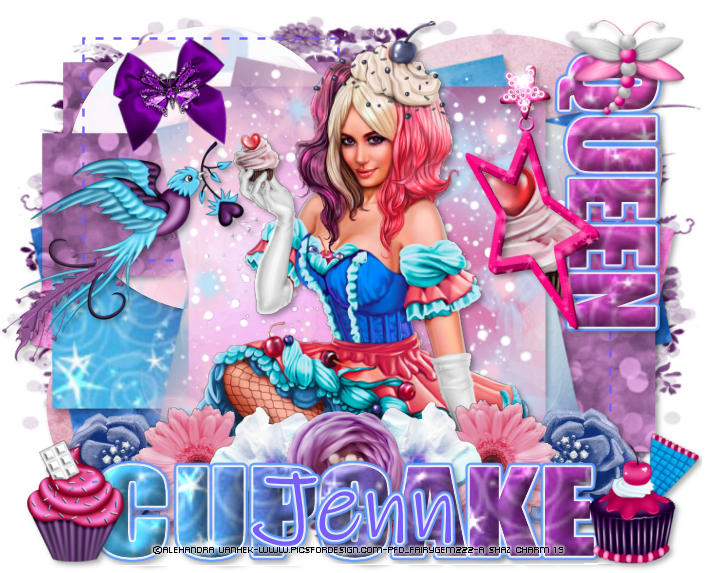
cupcakequeentag
Hugs
Shaz/Gem

Wednesday, 15 May 2019

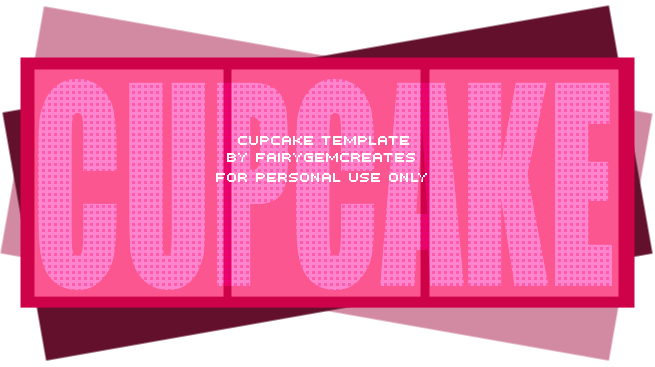
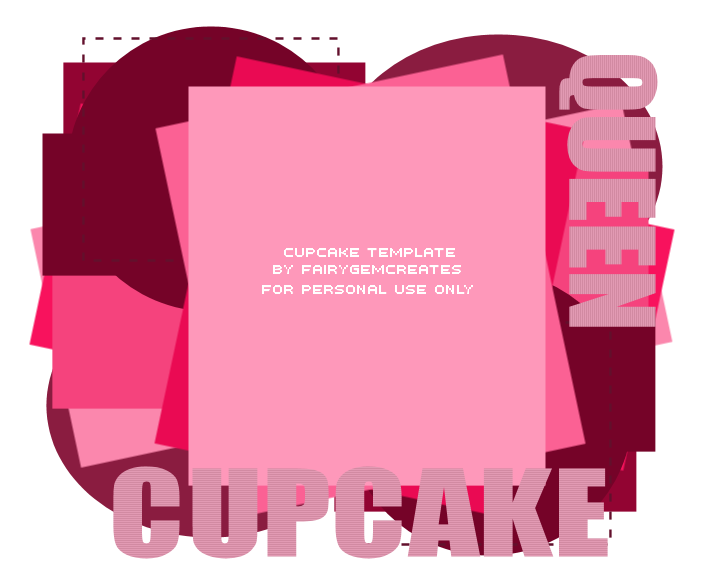
Cupcake Queen Template

Cupcake Queen Template Set
I have a beautiful kit and tube with a cupcake theme and hunted everywhere online for a template and couldn't find any so decided to make a set myself. I will be using it in a tutorial using Jenn's wonderful kit and Alehandra Vanhek's wonderful tube but thought i would share the template set just incase anyone else goes a hunting.

Here is a preview of the Set
cupcake template3
cupcake template 2
cupcake template 1


You can download here at Box

The templates are saved in Psp and Psd so can be used in both programs.
Have fun and please respect my TOU
Hugs
Shaz/Gem

Tuesday, 14 May 2019

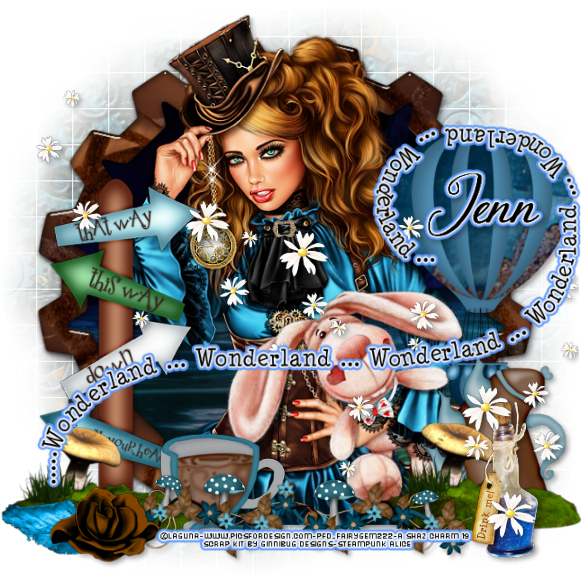
PTU Steampunk Alice PTU

Steampunk Alice
jennsteampunkalice
This tutorial was written by me Shaz/Gem on the 13th May 2019 and is all my own idea and creation. Any resemblance to other tutorials is purely coincidental and not intended. For this tutorial you will need to have a working knowledge of Paint Shop Pro. 

You will need:-
Paint Shop Pro - I am using X5 but any version will work.
Scrap kit - I am using an awesome kit by Jennifer at Ginnibug Designs called Steampunk Alice. You can buy this kit at Picsfordesign under the name LapisGin. HERE
Tube of choice - I am using a beautiful tube by Laguna called Steampunk Alice with Rabbit. You can buy the tube HERE
Mask of choice - I am using a wonderful mask by Designs by Vaybs Mask 72. Download HERE
Font of choice - I am using Allana-Regular which you can download HERE
Plugins:-
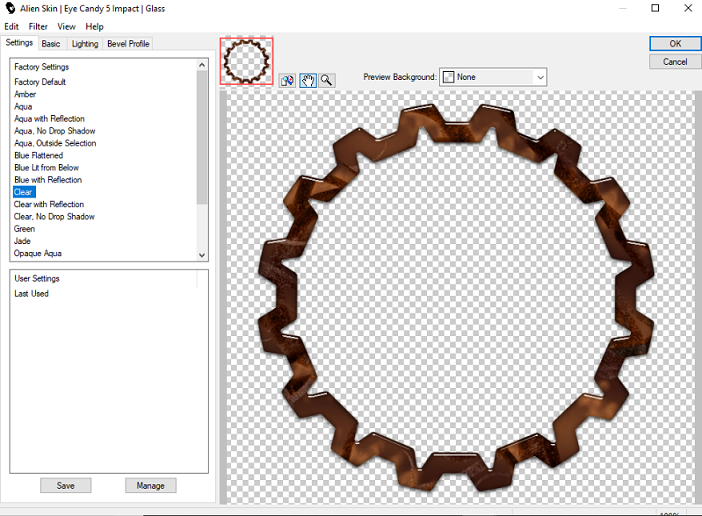
Eye Candy Impact - Glass
Eye Candy Impact - Gradient Glow

Lets Begin:-

1. Open new image 650 x 650 Transparent
2. Open Paper 9. Copy and Paste as a new layer. Layers load mask and load DBV_Mask 72, delete and Merge group.
3. Open Paper 14. Go to Colour palette foreground and click on pattern. Find the image of paper 35% Angle Size 100. Go to Preset Shapes and find Gear 5, width 30. Close fill and draw a circle (see mine for reference). Once happy with the size and placement convert to layer.
4. With your magic wand click inside frame, selections modify Expand by 7.
5. Open Paper 3 and Resize by 75% then 90%. Copy and paste as a new layer and move the paper where you would like. Invert Delete. Selections none. Move below frame layer.
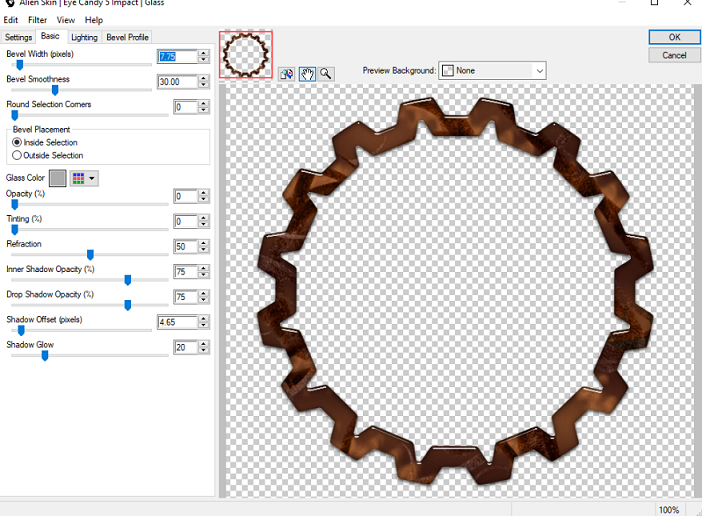
6. Make frame layer active. Plugins Eye candy impact Glass with the settings below. Drop shadow V3, H3, Opacity 35 Blur 7.63 Black.
steampunkaliceglasssettings1
steampunkaliceglasssettings2

7. Open Tube, Copy and paste as a new layer. Resize by 35% then 80%. Move to where you would like it placed. Drop shadow as above.
8.Open Element 55. Resize by 40%. Copy and paste moving to the left. Sharpen and drop shadow.
9. Open Element 49. Resize by 40%. Copy and paste moving down and left. Drop shadow.
10. Open Element 77. Resize by 55%. Copy and paste moving up and right. Drop shadow.
11. Open Element 66. Resize by 35% then 70%. Copy and paste moving slightly up and right. Drop shadow.
12. Make layer 6 active on your palette. Right click and duplicate, move to the right side of canvas. On layer palette bring to top.
13. Open Element 68. Resize by 25% then 80%. Copy and paste move slightly left. Sharpen and Drop shadow.
14. Open Element 78. Resize 30%. Copy and paste moving right and down. Sharpen and Drop shadow.
15. Open Element 69. Resize by 65%. Copy and paste moving down. Sharpen and Drop shadow.
16. Open Element 12. Resize by 30% then 75%. Copy and paste moving left and down. Drop shadow.
17. Open Element 25. Resize by 30%. Copy and paste moving left and down. Drop shadow.
18. Open Element 43. Copy and paste moving slightly left. Sharpen and Drop shadow.
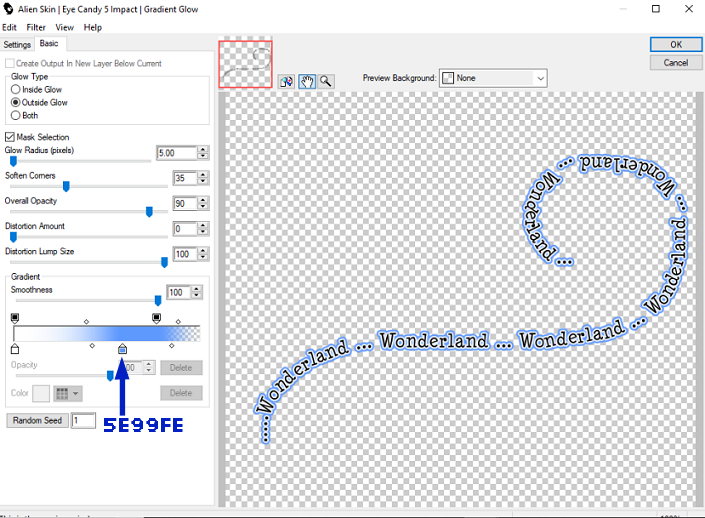
19. Open Element 9. Copy and paste moving slightly down. Eye candy Gradient glow settings below. Drop Shadow.
steampunkalicegradientglowsettings

20. Add your name using Allana Regular font and colour Black then add the same gradient glow.
21. Add your copyright and License details and save as a PNG

That's it we are done. 
I hope that you managed to follow the tutorial without any problems and enjoyed it at the same time.
Any questions or queries please don't hesitate to ask.
Hugs 
Shaz 

Monday, 13 May 2019

Oh my Goodness

Oh My Goodness

It sure has been a long time since i came here and did any tutorial work or making templates, masks or word art.
I have had to take a while away from PSP and being online due to 2 very different reasons.
Firstly my bipolar has been taking over my life and i couldn't concentrate on anything let alone make any tags. It got to the point everything i tried to make i ended up throwing away, and believe me it was a lot of tags. 
I finally started getting my head back together when i had a fall and hurt my shoulder. I pulled and tore all the ligaments and had a constant numbness in my hand. This went on for a few months with me popping pain relief and it started easing off. Then my black lab snapped at my cat and i went to swat her butt and pulled my shoulder again. The pain was so bad i felt physically sick with it and burst into tears, so Hayls dragged me down to A&E and i got x rays done. Turns out the ligaments and tendons weren't fixed and i needed to rest it up not using it for five days. I was given a sling to rest it and saw my own nurse five days later who told me to keep taking anti inflammatory and to rest but take it out for half hour three times a day. Well for the last 2 months the shoulder hasn't got any better and it looks like i am getting osteoarthritis in the joints too. Hopefully i can get an appointment with a doctor rather than a nurse as something needs to be done for the pain and fact i can't lift my arm or use it for anything heavy.
So that's what has been happening in my life.
On a plus note Hayls bought me a new laptop and i love it though getting used to Windows 10 is a fun pass time.
Thought i would write a few new tuts and maybe show off a few tags too 
So please keep eyes peeled for more to come
Hugs and best wishes to all
Shaz/Gem

Tuesday, 30 October 2018

PTU Voodoo Witch PTU

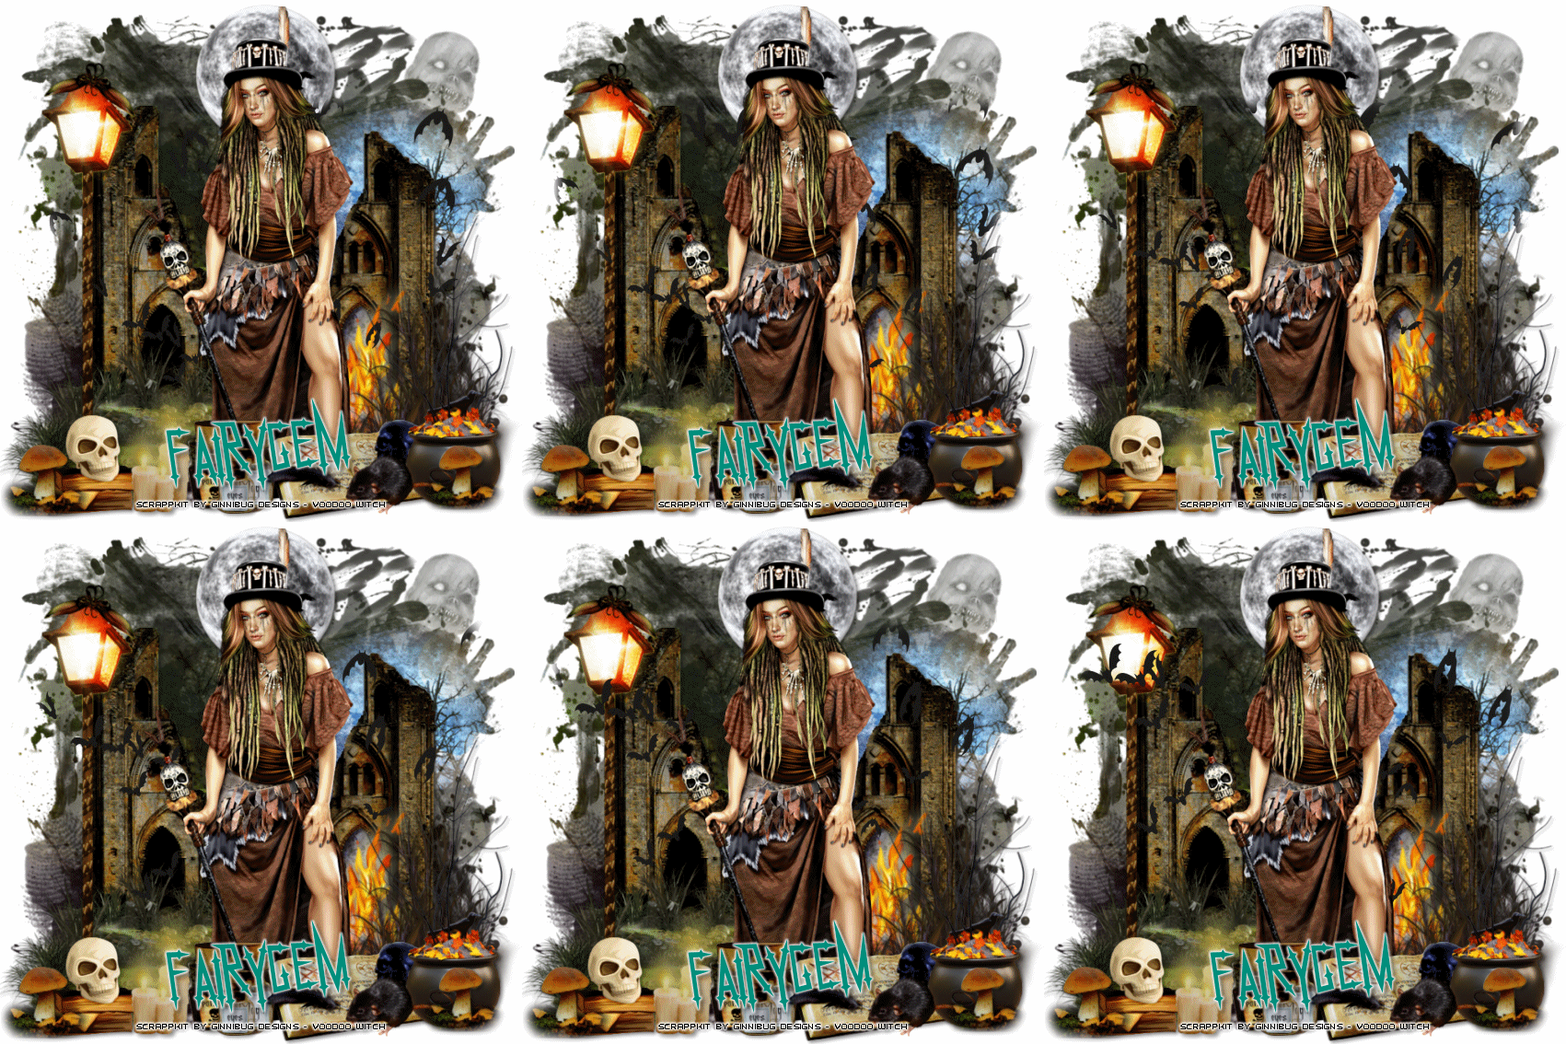
Voodoo Witch - Animated
jennifervw1
This tutorial was written by me Shaz/Gem on the 27th October 2018 and is all my own idea and creation. Any resemblance to other tutorials is purely coincidental and not intended.
For this tutorial you will need to have a working knowledge of Paint Shop Pro program and layers. Also you need to have a working knowledge of Jasc Animation Shop.

For this tutorial you will need:-

Paint Shop Pro - I am using X5 but any version will work.
Jasc Animation Shop 3 - This is no longer available but you can google and get a free version.
Scrap Kit - I am using a beautiful scrapkit by Jennifer at Ginnibug Designz. The kit is called Voodoo Witch and comes with so many elements, papers and frames plus 5 Masks Wordart and a Tube. Well worth the special price of $1. You can buy this kit at Picsfordesign under the name LapisGin  HERE
Tube of Choice - I am using a Stunning Exclusive tube by Misticheskaya called Enchantress. You need to have an Exclusive account to get this tube. You can buy it at Picsfordesign.
Mask of Choice - I am using a beautiful mask by SophisticatSimone called Mask0209-SophisticatSimone. You can get this mask on Simones blog - Scrappy Bit of Fun HERE but need to get it quick. Life isn't too good for her at the moment so she is closing her Blog down in 3 Months. You have to get as much as you can before she closes the blog as her stuff is totally amazing.
Animations - I am using 2 of Simones free animations
SimoneAni_Magic Balls 003
SimoneAni_Bats 002
You can download all Simones free Animations from her blog.
Font of Choice - I am using Nekrokids for name which you can find at Da Fonts, and for the Copyright Pf Tempster five which you can also get at Da Fonts.
Plugins:- 
Eyecandy 4000 Gradient Glow
Drop Shadow throughout tutorial - V3, H3, Opacity 45, Blur 6.25 Colour Black.

Open the tube in Psp and minimise for the moment.

Lets begin:-

1. Open New image 700x700.

2. Open Paper 15. Resize by 85%. Copy and Paste onto new image. Layers and Load the mask you are using. Delete mask layer and Merge group.

3. Open Element 101. Resize up by 110%. Copy and Paste moving up. Drop Shadow.

4. Open Element 106. Resize by 90%. Copy and Paste moving left and slightly down. Drop shadow.

5. Open Element 50. Resize by 75%. Copy and Paste moving right. Drop shadow.

6. Open Element 1. Resize by 80%. Copy and Paste moving right and down. Drop Shadow.

7. Maximise your tube layer and choose what layers you wish to be showing. Once happy Copy Merged and paste onto your image. If using the same tube as me Resize by 25%. Move the tube left and down. Once happy give a Drop shadow.

8. Open Element 21. Resize by 85%. Copy and Paste moving left. Drop Shadow. On layer palette move below the tube layer.

9. Open Element 25. Resize by 25%. Copy and Paste moving left and down. Drop shadow.

10. Open Element 35. Resize by 45%. Copy and paste moving left and down. Drop shadow.

11. Open Element 38. Resize by 20%. Copy and Paste moving left and slightly down.

12. Open Element 34. Resize by 20%. Copy and Paste moving slightly left and down. 

13. Open Element 27. Resize by 15%. Copy and Paste moving in front of the other 2 bottles.

14. Go back to Element 38 and merge down twice on your layer palette. Drop shadow.

15. Open Element 42. Resize by 25%. Copy and Paste moving slightly right and down. Drop shadow.

16. Open Element 76. Resize by 70%. Copy and Paste moving far right and down. Drop shadow.

17. Open Element 105. Resize by 25%. Copy and Paste moving in front of the book. Drop shadow.

18. Open Element 14. Resize by 25%. Copy and Paste moving far left. Duplicate and move far right. Resize the copy by 90% and merge down. Drop shadow.

19. Layers resize and resize all layers by 90% twice.

20. Add your copyright and license details.

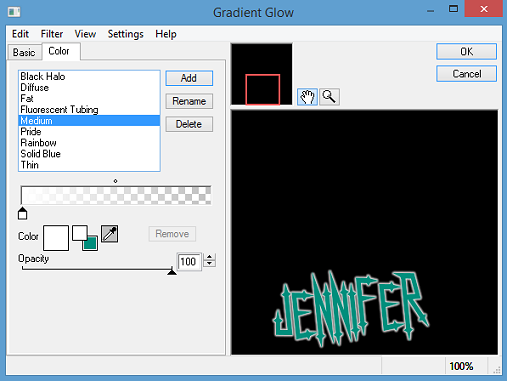
21. Add your name using font and colour #008e7c. Give a gradient glow settings below.
graident glow settings2 VW
Graident glow settings1 VW

Time to animate.

1. Open your Jasc Animation shop and the two animations by Simone. Resize the Magic Balls by 60% then 85%.

2. In Psp right click on your tag and Copy Merged.

3. In Animation shop right click and Paste as a new Animation.

4. Ctrl and Shift used together and hit the L button 17 times till you have 18 frames.

5. Click on the animation and hit Ctrl A, Ctrl C.

6. Click on your tag image and hit Ctrl A Ctrl E. Move the animation where you would like it, i moved mine so it was sitting in front of the ball. Once happy left click on your mouse to lock animation in.

7. View your animation and if happy Save as a gif.

For the second tag the animation is slightly longer to do but the finished result is well worth it.
fairygemVW1

1. On your original image delete the tube layer and copyright details.

2. Open the tube from the kit. Resize by 80%. Copy and Paste moving slightly down. Drop shadow.

3. Add copyright Scrap kit by Ginnibug Designz.

To Animate

1. Close off all layers in your layer palette from the tube up.

2. Right click and Copy Merged. Take over to animation shop and Right click Paste as new Animation.

3. Ctrl Shift and hit L 15 times to give you 16 layers.

4. Resize Simone's Bat 002 animation by 85%.

5. Staying on the animation Ctrl A Ctrl C.

6. Make your image layer active Ctrl A Ctrl E and place the bats where you would like. I placed mine close to the bottom of the tag to make them look like they are coming up from the ground. Once happy left click to lock animation in.

7. Back in Psp, close layers from the light down and open from tube up.

8. Right click Copy Merged, and take back to animation shop. Right click and Paste as new animation.

9. Ctrl Shift and hit L 15 times so you have 16 layers. Ctrl A Ctrl C and click on the original image.

10. Ctrl A Ctrl E and move the layers into place. Once happy left click to lock in place.

11. View your animation and if happy Save as a gif.

Remember when working in animation shop your back arrow comes in handy if you aren't happy with placement ect.


  That's it we are done. Sorry for tutorial being a long one but i hope you think the end result is worth it.
I would love to hear your feedback and if you have any questions leave a message and will get back to you asap. Would also love to see end results and add them to this tutorial so if you would like to share email your tags to me and i will get them added.

Hugs
Shaz/Gem


Thursday, 25 October 2018

PTU Spell Bound PTU

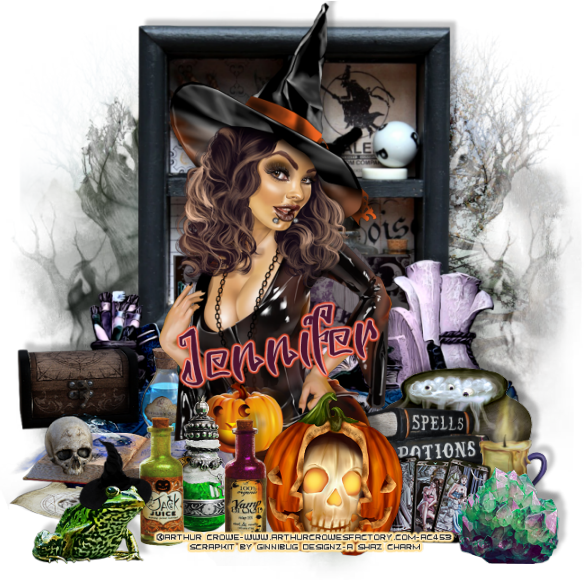
Spell Bound
jenniferSpellBound
This tutorial was written by me Shaz/Fairygem on the 25th October 2018 and is all my own idea and creation. Any resemblance to another tutorial is purely coincidental and not intended. For this tutorial you will need to have a working knowledge with the Paint Shop Pro program.

You will need:-
Scrapkit - I am using a beautiful new kit by Jennifer at Ginnibug Designz called Sybil Spells. This kit is so full of plenty of Elements and Papers as well as a few Clusters. You can buy this kit at Hanias Design Here and Picsfordesign Here
Tube of Choice - I am using an older tube by Arthur Crowe. I love his art and using his older tubes are a great way to start using him again. You can buy this tube and many more Here.
Mask of Choice - I am using one of Tonya's Masks called TBT_Halloween 1. You can find this mask and many more beautiful things Here.
Font of Choice - I am using a Halloween font called Spooky Wooky. You can find this at DA Fonts.

Plugins :-
Eyecandy 4000 - Gradient Glow.

Drop Shadow throughout tutorial unless otherwise stated is 
V-8, H8, Opacity 23, Blur 6.40 Colour Black.

Lets Begin :-

Open tube in Psp and minimise.

1. Open New image 650x650.

2. Open Paper 6 from kit. Copy and Paste onto canvas. Layers Mask and load the mask you are using. Delete mask layer and Merge group.

3. Open Element 12. Resize by 75%. Copy and Paste moving up toward top of canvas. Give Drop shadow.

4. Open Element 42. Resize by 55% then 80%. Copy and Paste moving slightly down. Give Drop shadow.

5. Open Element 76. Resize by 80%. Copy and Paste moving slightly down. Give Drop shadow.

6. Open Element 4. Resize by 30%. Copy and Paste moving slightly right. Sharpen and give Drop shadow.

7. Open Element 35. Resize by 70%. Copy and Paste moving left and slightly down. Sharpen and give Drop shadow.

8. Open Element 57. Resize by 25%. Copy and Paste moving right and slightly down. Sharpen and give Drop shadow.

9. Open Element 48. Resize by 25%. Copy and Paste moving far right and down. Sharpen and give Drop shadow.

10. Maximise your tube and if using the same as me close off all layers apart from piercings and Tube. Copy and Paste. Resize by 55% and position where you would like her. Drop shadow.

11. Open Element 58. Resize by 25% then 90%. Copy and Paste moving right and down. Sharpen and give Drop shadow.

12. Open Element 68. Resize by 25%. Copy and Paste moving slightly left and down. Sharpen and give Drop shadow.

13. Open Element 73. Resize by 30%. Copy and Paste moving slightly right and down. Sharpen and give Drop shadow.

14. Open Element 87. Resize by 40%. Copy and Paste moving slightly left and down. Give Drop shadow.

15. Open Element 88. Resize by 40%. Copy and Paste moving left and down. Give Drop shadow.

16. Open Element 95. Resize by 25%. Copy and Paste moving far  left and down. Sharpen and give Drop shadow.

17. Open Element 102. Resize by 25%. Copy and Paste moving far right and down. Sharpen and give Drop shadow.

18. Add Copyright and License details.

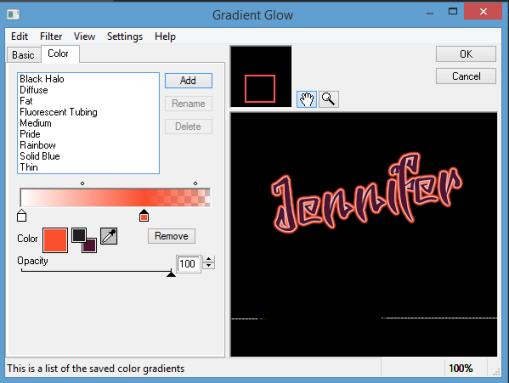
19. Add your name using Spooky Wooky font and colour #4d132f. Plugins Gradient glow with settings below.
Gradient glow settings1SB
Gradient glow settings2SB

Save as a PNG.

That's it we are finished. I hope you enjoyed my tutorial and found it easy to follow. Remember though this is just a guideline make the tag your own.
I would love to see your results and add them to this thread, so if you would like to share please email me with your results and i will get them added.
Happy Halloween
Hugs
Shaz/Gem


PTU Halloween Fun PTU

Halloween Fun
jennifer Spells of fun
This tutorial was written by me Shaz/Fairygem on 24th October 2018 and is all my own idea and creation.
Any resemblance to other tutorials is purely coincidental and not intended.
For this tutorial you will need to have a working knowledge of Paint Shop Pro and working with layers.

You will need:-
Paint Shop Pro programme – I am using X5 but any version will work.
Scrapkit – I am using a wonderful new kit by Jennifer at Ginnibug Designs called Spells of Fun. You can buy this kit from Hanias Design HERE
Tube of Choice – I am using an older Halloween tube by Laguna called Halloween Orchestra. You can buy this tube at Picsfordesign HERE
Mask of choice – I am using an awesome Halloween mask by Kristin at Toxic Desire. You can find her site HERE
Font of choice – I am using Aquarelle which you can find through google if you don’t have it already
Plugins – Eyecandy 4000 – Gradient Glow
Drop Shadow throughout tutorial unless otherwise stated -  V9, H-12, Opa 33, Blur 11.23 Black
Lets begin:-
Open tube in Psp and minimise.

1.   Open New image 650x600.
2.   Open Paper 8 from kit. Resize 85%. Copy and Paste. Layers mask and load your mask. Delete mask layer and merge Group.

3.   Open Cluster 1. Mirror. Copy and Paste moving down and slightly right. Give drop shadow.

4.   Open Element 54. Resize 60%. Copy and Paste moving up and right. In layer palette move this layer below layer 2. Drop shadow.

5.   Open Element 8. Resize 40%. Copy and Paste moving down and left. Drop Shadow.

6.   Open Element 15. Resize 25%. Copy and Paste moving down and left. Drop Shadow.

7.   Open Element 33. Resize 45%. Copy and Paste moving down and right. Drop Shadow.

8.   Open Element 19. Resize 35%. Copy and Paste moving down and right placing in front of Scarecrow. Drop Shadow.

9.   Open Element 52. Resize 35%. Copy and Paste moving down and left. Drop Shadow.

10.                      Open Element 59. Resize 35%. Copy and Paste moving down and slightly right. Drop Shadow.

11.                      Open Element 72. Resize 40%. Copy and Paste moving in front of Pumpkins. Drop Shadow as before but change the colour to #27fa10. Repeat twice more.

12.                      With your Tube if using the same as me, close off layers you don’t want to use. Once happy Copy Merged and paste as a new layer onto your canvas. Resize by 40% then 60%. Mirror then move slightly up. Plugins Gradient Glow with settings below.
gradient glow settings spells 1
gradient glow settings spells 2

13.                      Add Copyright and License details.

14.                      Add name using Aquarelle and colour #16fb0f. Same Gradient glow as above. Drop Shadow as before but change colour back to black.

Save as a Png.

That’s it we are done. I hope you enjoyed my tutorial and found it easy to follow.
Any questions please don’t hesitate to ask.
I would love to see your results so please if you wish Email me and I will get them added.
Hugs to all
Shaz

Tuesday, 23 October 2018

Its been a long time


Its been a long time since i was last online-6 months to be exacted. I had to take a break life was really getting me down and i just wanted to shut myself away which in the end i did. 
Then had problems with lappy but thats all sorted now too.
Came back to a nightmare!!. I really don't know what postimage is playing at but they have deleted all my albums meaning i am having to go through everything and reload images. No email nothing just destroy 12 folders full of tags and kit previews plus tags that are gifted to people. So angry with them, my eldest told me to send them an email to find out why they did this but at the moment am too busy sorting my blog out again.
Anyway so please bear with me while i sort out my posts on here
Hugs
Shaz/Gem

Thursday, 26 April 2018

PTU Tick Tock Tick Tock PTU

Tick Tock Tick Tock
jenniferticktock
This tutorial was written by me Shaz/Fairygem on the 26th April 2018 and is all my own idea and creation. Any resemblance to other tutorials is purely coincidental and not intended.

For this tutorial you will need:-
Paint Shop Pro - I am using X5 but any version will work.
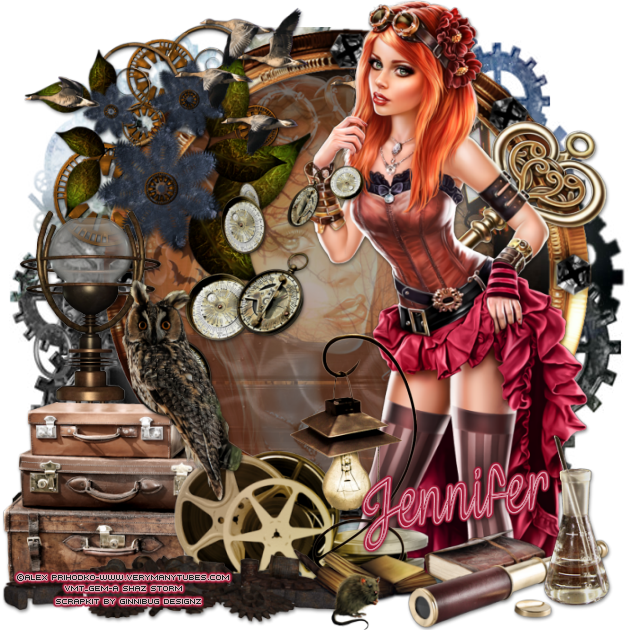
Scrapkit - I am using a wonderful kit by Jennifer at Ginnibug Designz called Steampunk Wizard. You can buy this kit and many more of Jenns at Hanias Design HERE.
Tube of Choice - I am using a wonderful tube by Alex Prihodko called Steampunk Doll. You can buy this tube HERE where Alex has started selling her art.
Mask of Choice - I am using a wonderful Steampunk mask by Babs at Bitzy Bee Designz called BBD_2012SPMask 5. You can download it HERE.
Font of Choice - I am using MF Wedding Bells. You can download it HERE.
Plugins:-
EyeCandy 4000 - Gradient Glow
Xero - DuoChrome

Ok lets begin:-

1. Open New Image 700x700.
2. Open Paper 12, Copy and Paste. Load Mask with Invert Transparency Ticked. Delete mask layer and merge group.
3. Open Frame 1, Resize by 90%. Copy and Paste moving right and up.
4. Magic wand and click inside of frame. Modify Expand by 10. Open Paper 11, Resize by 75%. Copy and Paste moving paper to the part you want showing. Invert and delete overhanging paper. DO NOT DESELECT
5. Open your tube and click on Close Up. Mirror and resize by 55%. Copy and Paste moving over to the left side in the frame. Once happy with position Delete. Selections None.
6. Give frame layer and close up layer drop shadow. 
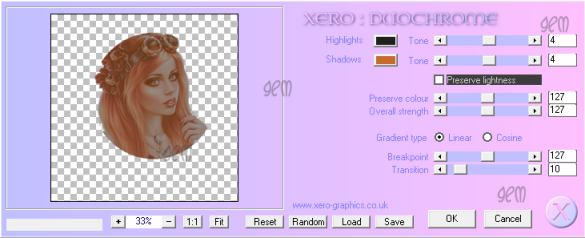
7. On Close Up layer go to Plugins Xero-DuoChrome settings below. Layer Palette and change Opacity to 65.
xero settings tick tock

8. Open your Main tube and choose the colours you wish to use. Copy and Paste then Resize by 55% then 85%. Move tube up and slightly over to the right. Drop Shadow.
9. Open Element 16, Resize by 40%. Copy and Paste moving left and up so its at the top of frame. Sharpen and Drop Shadow.
10. Open Element 5, Resize by 55%. Copy and Paste moving left. Drop Shadow.
11. Open Element 13, Resize by 55%. Copy and Paste moving left. Drop Shadow.
12. Open Element 11, Resize by 60%. Copy and Paste moving left. Drop Shadow.
13. Open Element 35, Resize by 55%. Copy and Paste moving towards the tube. Sharpen and Drop Shadow.
14. Open Element 34, Resize up by 115%. Copy and Paste moving towards the tube. Drop Shadow.
15. Open Element 6, Resize by 55%. Copy and Paste moving left. Drop Shadow.
16. Open Element 21, Resize by 40%. Copy and Paste moving right. Drop Shadow.
17. Open Element 97, Resize by 40%. Copy and Paste moving far right.
18. Open Element 32. Copy and Paste moving down. Drop Shadow.
19. Open Element 9, Resize by 40%. Copy and Paste moving up slightly. Drop Shadow.
20. Open Element 49, Resize by 70%. Copy and Paste moving up to top of frame. Eraser tool and erase the goose in front of the tube. Drop Shadow.
21. Open Element 99, Resize by 40%. Copy and Paste moving so that it looks like its sitting on the luggage. Drop Shadow.
22. Add License details and Copyright.
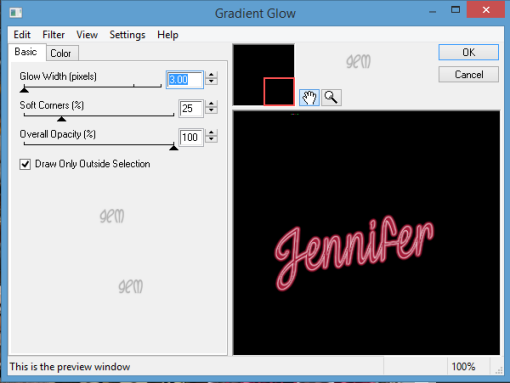
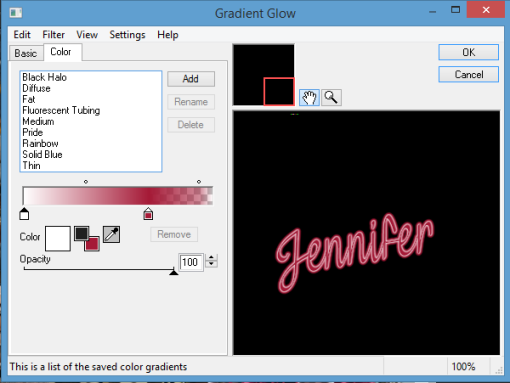
23. Add your name using font and colour #a51a37. Add Gradient glow settings below. Drop Shadow.
gradient glow settings tick tock 1

Save as a PNG.

That's it we are done. I hope you found my tutorial easy to follow. Any questions please don't hesitate to ask. 
Remember my tut is a guideline only make the tag yours.
I would love to see your results so if you would like to share just email me and i will get them added.

Hugs
Shaz/Fairygem

Tuesday, 24 April 2018

PTU Smells of Spring PTU

PTU  Smells of Spring  PTU
Forum Set 

jennifersosfs
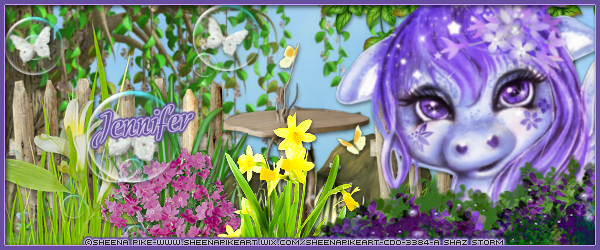
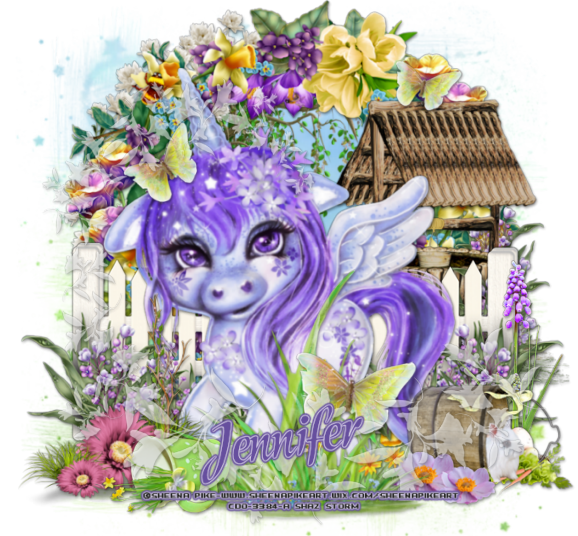
jennifersostag
This tutorial was written by me Shaz/Fairygem on 24th April 2018 and are all my own idea and creations. Any resemblance to other tutorials is purely coincidental and not intended.
For this tutorial you will need to have a good working knowledge of paint shop pro and working on different tags. This tutorial is a long one but hopefully i have explained everything you need to know and it will be worth the end result.

For this you will need:-
Paint Shop Pro - I am using X5 but any version will work the same.
Scrapkit - I am using a stunning new kit by Jennifer at Ginnibug Designz called Smells of Spring. You can buy this kit at Hanias Design HERE or at Picsfordesign HERE under the name LapisGin.
Tube of Choice - I am using a gorgeous new tube by Sheena Pike. You can buy this tube at CDO HERE. Please make sure you have a working license to use this artwork.
Mask of Choice - I am using WSL_424 by Chelle at WeeScotsLass Creations HERE.
Font of Choice - I am using Modeschrift font for the Name on the Tag and Forum tag and PF Arma five for the Avatar. You can download HERE and HERE
Plugins :-
Eyecandy 4000 - Gradient Glow
Drop Shadow throughout unless otherwise stated - V2, H1, Opa 75, Blur 5 Black.

We will Start with the Tag:-

1. New Image 750x700 We will resize later.
2. Open Paper 12. Copy and Paste as new layer. Layers Load Mask and find mask you are using. Delete Mask layer and merge Group.
3. Open Frame 2. Copy and Paste moving slightly up. Magic Wand , Click inside frame, Expand by 10.
4. Open Paper 20, Resize by 65%. Copy and Paste moving paper until happy with the position. Invert and delete overhanging. Move paper below frame and give Drop Shadow.
5. Open Element 44, Resize by 90%. Copy and Paste moving right of frame. Drop Shadow.
6. Open Element 110. Copy and Paste moving slightly up. Drop Shadow.
7. Open Tube, if using same as me Resize by 75%. Copy and Paste moving slightly down. Drop Shadow.
8. Open Element 6, Resize by 40%. Copy and Paste moving over to the right. Sharpen and Drop Shadow.
9. Open Element 68, Resize by 45%. Copy an Paste moving right and slightly down. Sharpen and Drop Shadow.
10. Open Element 2, Resize by 30% then 55%. Copy and Paste moving right and down. Duplicate and Resize by 80%. Move slightly right. Merge down, Sharpen and Drop Shadow.
11. Open Element 41, Resize by 45%. Copy and Paste moving left. Sharpen and Drop Shadow.
12. Open Element 40, Resize by 45% then 65%. Copy and Paste moving left and down slightly. Sharpen and Drop Shadow.
13. Open Element 5, Resize by 50%. Copy and Paste moving down. Sharpen and Drop Shadow.
14. Open Element 51, Resize by 80%. Copy and Paste moving slightly up. Sharpen and Drop Shadow.
15. Open Element 70. Mirror then Copy and Paste moving slightly up. Drop Shadow.
16. Resize Image by 90% all layers checked. Add Copyright and License details.
17. Add name using font and colour #664f9e.
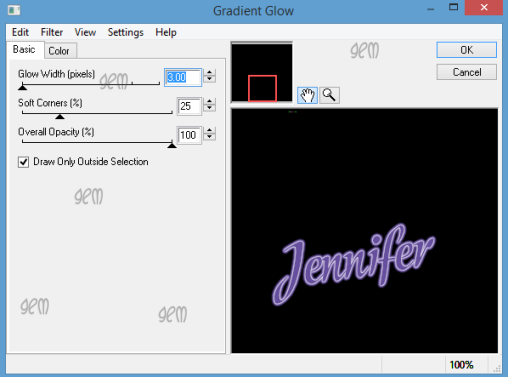
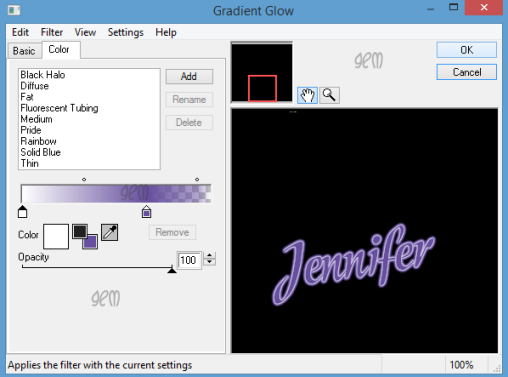
18. Add gradient glow using settings below. Add Drop Shadow.
gradientglowsettingssos1
gradientglowsettingssos2
Save as a png.

Now Onto the Forum Tag.

1. Open New Image 600x250.
2. Open Paper 20, Resize by 75%. Copy and Paste moving paper to where you want showing.
3. Open Element 17, Resize by 65%. Copy and Paste moving to the right. Drop Shadow.
4. Open Element 7, Resize by 65%. Copy and Paste moving slightly down. Drop Shadow.
5. Open Element 85, Resize by 45%. Copy and Paste moving slightly down. Drop Shadow.
6. Open Element 39, Resize by 40%. Copy and Paste moving left and slightly down. Drop Shadow.
7. Open Element 26, Resize by 35%. Copy and Paste moving slightly left and down. Drop Shadow.
8. Open Element 33, Resize by 30% then 70%. Copy and Paste placing in front of Element 26. Drop Shadow.
9. Open Tube, Resize by 80%. Copy and Paste moving far right. Drop Shadow.
10.  Open Element 58, Resize by 30%. Copy and Paste moving slightly down. Drop Shadow.
11. Open Element 42, Resize by 70%. Copy and Paste moving in front of tube. Drop Shadow.
12. Open Element 104, Resize by 45%. Copy and Paste moving left. Drop Shadow.
13. Shift D and Duplicate forum tag. Leave this and go back to original.
14. Add New Layer. Selections all, Modify and Contract by 5, Invert and flood fill with #669f9e. Selections None. Effects Edge Enhance. Drop Shadow then change V1, H2 and Drop Shadow again.
15. Add copyright and license details. Add name using same font and colour as Main tag. Add gradient glow previously used. Add Drop Shadow
Save as a png.

Avatar
I find this way a lot easier and i know its a cheat but its a good cheat lol. 

1. Go back to Duplicated Forum tag.
2. Highlight Tube layer and Resize by 70%. Mirror and move over to left side.
3. With your Crop tool place over your Tube and set it at 170x170 making sure you have the parts you want showing in the crop. Once happy click the tick and crop the tag.
4. On layer palette delete layers that are blank. I also deleted the butterfly bubbles layer.
5. Add a new layer, Selections all, Modify Contract by 2. Invert and flood fill with same colour as forum tag. Edge Effects Enhance. Drop Shadow as Forum tag.
6. Add Copyright and License details. Add name using a Pixel font i used pf Arma 5 size 11. 
7. Add Gradient glow previously used. Add Drop Shadow.
Save as png.

Thats it we are done with your Forum Set.
I hope you found the tutorial easy to follow and enjoyed it as much as i did writing it.
Any Questions please leave a comment or email me.
I would love to see your results so if you would like to share with me please email me at fairygem1@gmail.co.uk
Thanks so much
Hugs
Shaz/Fairygem