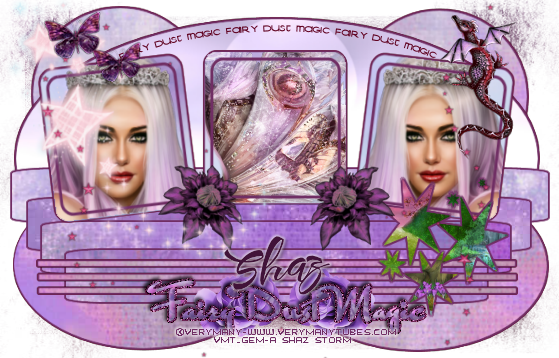
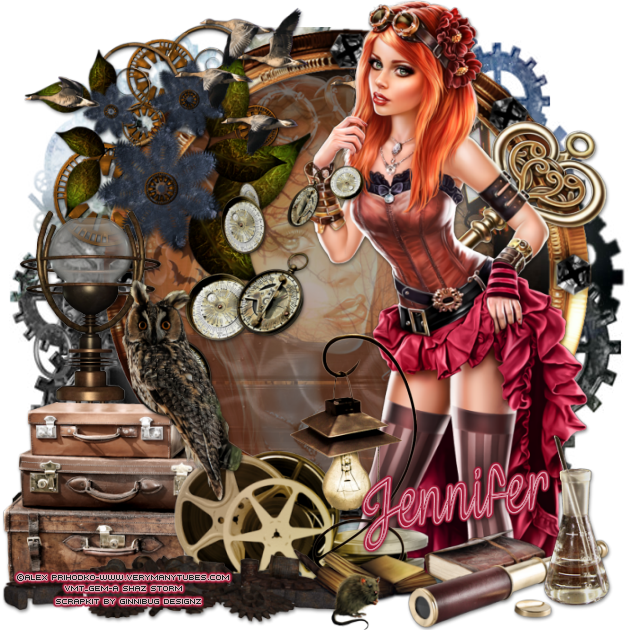
Pages

Thursday 26 April 2018

PTU Tick Tock Tick Tock PTU

Tick Tock Tick Tock
jenniferticktock
This tutorial was written by me Shaz/Fairygem on the 26th April 2018 and is all my own idea and creation. Any resemblance to other tutorials is purely coincidental and not intended.

For this tutorial you will need:-
Paint Shop Pro - I am using X5 but any version will work.
Scrapkit - I am using a wonderful kit by Jennifer at Ginnibug Designz called Steampunk Wizard. You can buy this kit and many more of Jenns at Hanias Design HERE.
Tube of Choice - I am using a wonderful tube by Alex Prihodko called Steampunk Doll. You can buy this tube HERE where Alex has started selling her art.
Mask of Choice - I am using a wonderful Steampunk mask by Babs at Bitzy Bee Designz called BBD_2012SPMask 5. You can download it HERE.
Font of Choice - I am using MF Wedding Bells. You can download it HERE.
Plugins:-
EyeCandy 4000 - Gradient Glow
Xero - DuoChrome

Ok lets begin:-

1. Open New Image 700x700.
2. Open Paper 12, Copy and Paste. Load Mask with Invert Transparency Ticked. Delete mask layer and merge group.
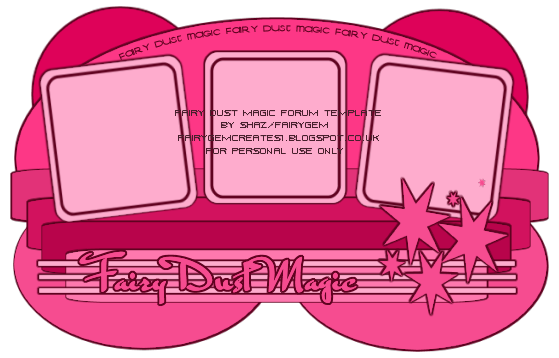
3. Open Frame 1, Resize by 90%. Copy and Paste moving right and up.
4. Magic wand and click inside of frame. Modify Expand by 10. Open Paper 11, Resize by 75%. Copy and Paste moving paper to the part you want showing. Invert and delete overhanging paper. DO NOT DESELECT
5. Open your tube and click on Close Up. Mirror and resize by 55%. Copy and Paste moving over to the left side in the frame. Once happy with position Delete. Selections None.
6. Give frame layer and close up layer drop shadow. 
7. On Close Up layer go to Plugins Xero-DuoChrome settings below. Layer Palette and change Opacity to 65.
xero settings tick tock

8. Open your Main tube and choose the colours you wish to use. Copy and Paste then Resize by 55% then 85%. Move tube up and slightly over to the right. Drop Shadow.
9. Open Element 16, Resize by 40%. Copy and Paste moving left and up so its at the top of frame. Sharpen and Drop Shadow.
10. Open Element 5, Resize by 55%. Copy and Paste moving left. Drop Shadow.
11. Open Element 13, Resize by 55%. Copy and Paste moving left. Drop Shadow.
12. Open Element 11, Resize by 60%. Copy and Paste moving left. Drop Shadow.
13. Open Element 35, Resize by 55%. Copy and Paste moving towards the tube. Sharpen and Drop Shadow.
14. Open Element 34, Resize up by 115%. Copy and Paste moving towards the tube. Drop Shadow.
15. Open Element 6, Resize by 55%. Copy and Paste moving left. Drop Shadow.
16. Open Element 21, Resize by 40%. Copy and Paste moving right. Drop Shadow.
17. Open Element 97, Resize by 40%. Copy and Paste moving far right.
18. Open Element 32. Copy and Paste moving down. Drop Shadow.
19. Open Element 9, Resize by 40%. Copy and Paste moving up slightly. Drop Shadow.
20. Open Element 49, Resize by 70%. Copy and Paste moving up to top of frame. Eraser tool and erase the goose in front of the tube. Drop Shadow.
21. Open Element 99, Resize by 40%. Copy and Paste moving so that it looks like its sitting on the luggage. Drop Shadow.
22. Add License details and Copyright.
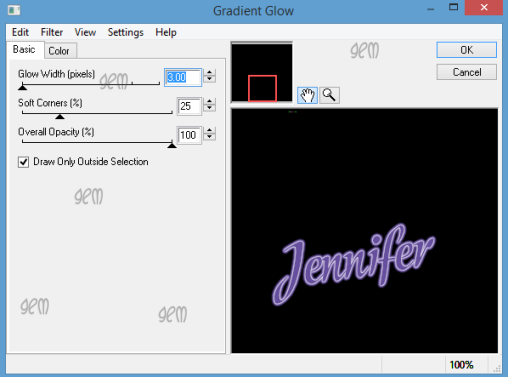
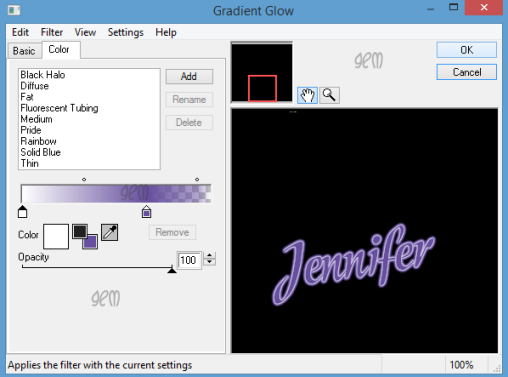
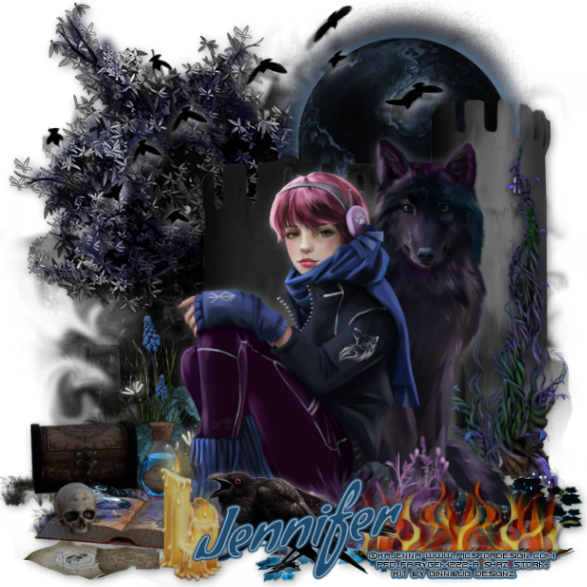
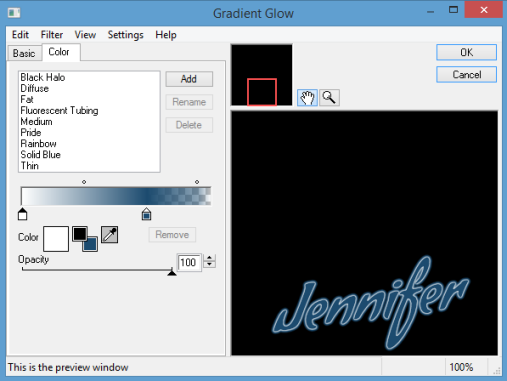
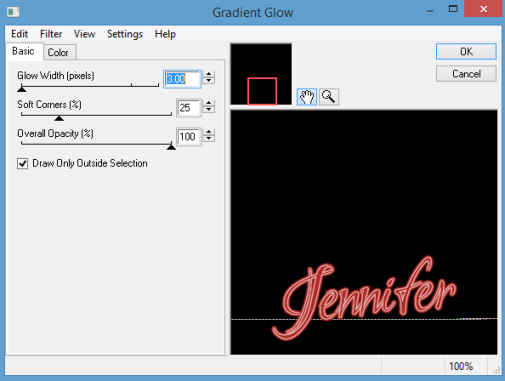
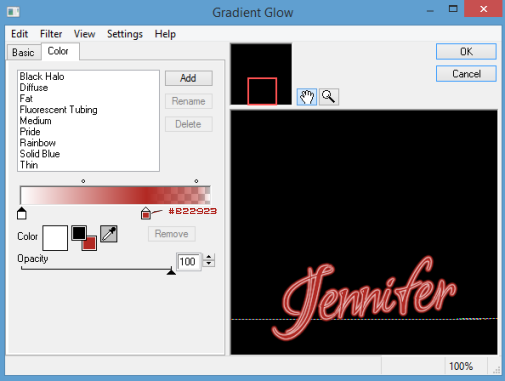
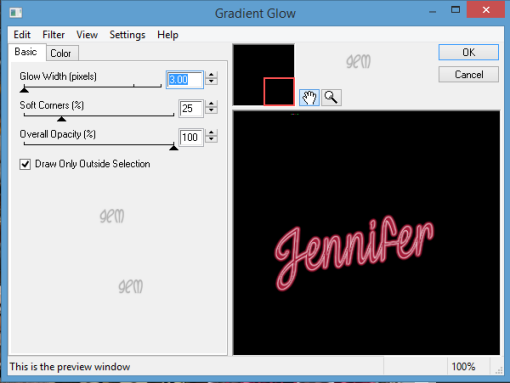
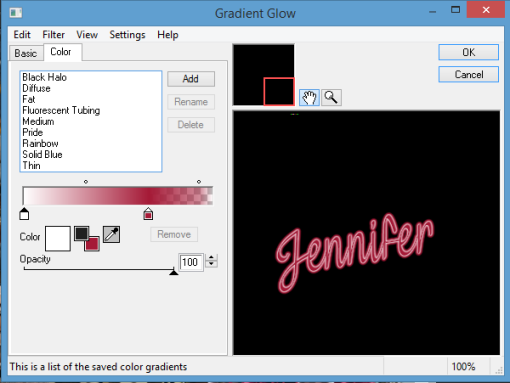
23. Add your name using font and colour #a51a37. Add Gradient glow settings below. Drop Shadow.
gradient glow settings tick tock 1

Save as a PNG.

That's it we are done. I hope you found my tutorial easy to follow. Any questions please don't hesitate to ask. 
Remember my tut is a guideline only make the tag yours.
I would love to see your results so if you would like to share just email me and i will get them added.

Hugs
Shaz/Fairygem

Tuesday 24 April 2018

PTU Smells of Spring PTU

PTU  Smells of Spring  PTU
Forum Set 

jennifersosfs
jennifersostag
This tutorial was written by me Shaz/Fairygem on 24th April 2018 and are all my own idea and creations. Any resemblance to other tutorials is purely coincidental and not intended.
For this tutorial you will need to have a good working knowledge of paint shop pro and working on different tags. This tutorial is a long one but hopefully i have explained everything you need to know and it will be worth the end result.

For this you will need:-
Paint Shop Pro - I am using X5 but any version will work the same.
Scrapkit - I am using a stunning new kit by Jennifer at Ginnibug Designz called Smells of Spring. You can buy this kit at Hanias Design HERE or at Picsfordesign HERE under the name LapisGin.
Tube of Choice - I am using a gorgeous new tube by Sheena Pike. You can buy this tube at CDO HERE. Please make sure you have a working license to use this artwork.
Mask of Choice - I am using WSL_424 by Chelle at WeeScotsLass Creations HERE.
Font of Choice - I am using Modeschrift font for the Name on the Tag and Forum tag and PF Arma five for the Avatar. You can download HERE and HERE
Plugins :-
Eyecandy 4000 - Gradient Glow
Drop Shadow throughout unless otherwise stated - V2, H1, Opa 75, Blur 5 Black.

We will Start with the Tag:-

1. New Image 750x700 We will resize later.
2. Open Paper 12. Copy and Paste as new layer. Layers Load Mask and find mask you are using. Delete Mask layer and merge Group.
3. Open Frame 2. Copy and Paste moving slightly up. Magic Wand , Click inside frame, Expand by 10.
4. Open Paper 20, Resize by 65%. Copy and Paste moving paper until happy with the position. Invert and delete overhanging. Move paper below frame and give Drop Shadow.
5. Open Element 44, Resize by 90%. Copy and Paste moving right of frame. Drop Shadow.
6. Open Element 110. Copy and Paste moving slightly up. Drop Shadow.
7. Open Tube, if using same as me Resize by 75%. Copy and Paste moving slightly down. Drop Shadow.
8. Open Element 6, Resize by 40%. Copy and Paste moving over to the right. Sharpen and Drop Shadow.
9. Open Element 68, Resize by 45%. Copy an Paste moving right and slightly down. Sharpen and Drop Shadow.
10. Open Element 2, Resize by 30% then 55%. Copy and Paste moving right and down. Duplicate and Resize by 80%. Move slightly right. Merge down, Sharpen and Drop Shadow.
11. Open Element 41, Resize by 45%. Copy and Paste moving left. Sharpen and Drop Shadow.
12. Open Element 40, Resize by 45% then 65%. Copy and Paste moving left and down slightly. Sharpen and Drop Shadow.
13. Open Element 5, Resize by 50%. Copy and Paste moving down. Sharpen and Drop Shadow.
14. Open Element 51, Resize by 80%. Copy and Paste moving slightly up. Sharpen and Drop Shadow.
15. Open Element 70. Mirror then Copy and Paste moving slightly up. Drop Shadow.
16. Resize Image by 90% all layers checked. Add Copyright and License details.
17. Add name using font and colour #664f9e.
18. Add gradient glow using settings below. Add Drop Shadow.
gradientglowsettingssos1
gradientglowsettingssos2
Save as a png.

Now Onto the Forum Tag.

1. Open New Image 600x250.
2. Open Paper 20, Resize by 75%. Copy and Paste moving paper to where you want showing.
3. Open Element 17, Resize by 65%. Copy and Paste moving to the right. Drop Shadow.
4. Open Element 7, Resize by 65%. Copy and Paste moving slightly down. Drop Shadow.
5. Open Element 85, Resize by 45%. Copy and Paste moving slightly down. Drop Shadow.
6. Open Element 39, Resize by 40%. Copy and Paste moving left and slightly down. Drop Shadow.
7. Open Element 26, Resize by 35%. Copy and Paste moving slightly left and down. Drop Shadow.
8. Open Element 33, Resize by 30% then 70%. Copy and Paste placing in front of Element 26. Drop Shadow.
9. Open Tube, Resize by 80%. Copy and Paste moving far right. Drop Shadow.
10.  Open Element 58, Resize by 30%. Copy and Paste moving slightly down. Drop Shadow.
11. Open Element 42, Resize by 70%. Copy and Paste moving in front of tube. Drop Shadow.
12. Open Element 104, Resize by 45%. Copy and Paste moving left. Drop Shadow.
13. Shift D and Duplicate forum tag. Leave this and go back to original.
14. Add New Layer. Selections all, Modify and Contract by 5, Invert and flood fill with #669f9e. Selections None. Effects Edge Enhance. Drop Shadow then change V1, H2 and Drop Shadow again.
15. Add copyright and license details. Add name using same font and colour as Main tag. Add gradient glow previously used. Add Drop Shadow
Save as a png.

Avatar
I find this way a lot easier and i know its a cheat but its a good cheat lol. 

1. Go back to Duplicated Forum tag.
2. Highlight Tube layer and Resize by 70%. Mirror and move over to left side.
3. With your Crop tool place over your Tube and set it at 170x170 making sure you have the parts you want showing in the crop. Once happy click the tick and crop the tag.
4. On layer palette delete layers that are blank. I also deleted the butterfly bubbles layer.
5. Add a new layer, Selections all, Modify Contract by 2. Invert and flood fill with same colour as forum tag. Edge Effects Enhance. Drop Shadow as Forum tag.
6. Add Copyright and License details. Add name using a Pixel font i used pf Arma 5 size 11. 
7. Add Gradient glow previously used. Add Drop Shadow.
Save as png.

Thats it we are done with your Forum Set.
I hope you found the tutorial easy to follow and enjoyed it as much as i did writing it.
Any Questions please leave a comment or email me.
I would love to see your results so if you would like to share with me please email me at fairygem1@gmail.co.uk
Thanks so much
Hugs
Shaz/Fairygem

Saturday 14 April 2018

Please bare with me

As many of you pspers know Post image has had a problem the last couple of days. 
This has meant that most of my pictures aren't showing at the moment, but have just found out that i can upload images straight into my posts on here through my computer so i won't lose anything as long as they are on my computer.
So over the next couple of days maybe more but am being positive I will be editing all my posts and getting images uploaded from my computer. 
Please please bare with me i promise that it will all be sorted asap.
Thanks so much
Hugs
Shaz/fairygem

Friday 13 April 2018

PTU Darkness PTU

Darkness
jenniferdarkness
This tutorial was written by me Shaz/Fairygem on the 13th April 2018 and is all my own idea and creation. Any resemblance to other tutorials is purely coincidental and not intended.
For this tutorial you will need:-
Paint Shop Pro - I am using X5 but any version will work.
Scrapkit - I am using an awesome kit by Jennifer at Ginnibug Designz called Dark Night. You can buy this kit at Hanias Design HERE.
Tube of Choice - I am using a wonderful tube by Kajenna called Black Wolf. You can buy this tube and many more at Picsfordesign HERE.
Mask of Choice - I am using Mask 12 by Leah at Gimptastic Tutorials. You can download HERE.
Font of Choice - I am using Condiment Regular. You can download HERE.
Plugins:-
Eyecandy 4000 - Gradient Glow
Drop Shadow throughout - V2, H2, 45 and 15 Black.

Lets Begin:-
1. Open new image 650 x 650.
2. Open Paper 6, Resize by 85%. Copy and Paste. Load Mask and find the mask you are using. Delete mask layer and merge group.
3. Open Element 1. Copy and Paste moving left and slightly up. Drop Shadow.
4. Open Element 7. Copy and Paste moving right and slightly up. Drop Shadow.
5. Open Element 12, Resize by 50%. Copy and Paste moving slightly up and right. Drop Shadow. On layer palette move below castle.
6. Open Element 6, Resize by 60%. Mirror. Copy and Paste moving down and right. Drop Shadow.
7. Open Element 35, Resize by 45%. Copy and Paste moving down and left. Drop Shadow.
8. Open Tube and if using same as me Resize by 30% then 80%. Copy and Paste moving slightly right. Drop Shadow but change colour to white.
9. Open Element 61, Resize by 85%. Mirror. Copy and Paste moving down and right. In layer palette move under leaves. Eraser tool and erase overhanging. Drop Shadow but change colour back to black.
10. Open Element 9, Resize by 70%. Copy and Paste moving down and left. Drop Shadow.
11. Open Element 42, Resize by 30% then 70%. Copy and Paste moving down and slightly left. Drop Shadow.
12. Open Element 27, Resize by 40%. Copy and Paste moving down and right. Drop Shadow.
13. Open Element 73, Resize by 85%. Mirror. Copy and Paste moving up and left. Drop Shadow x2 but change colour to white. Eraser tool and erase birds over Wolfs face.
14. Open Element 38, Resize by 30%. Copy and Paste moving down. Drop Shadow as above.
15. Add Copyright and License details.
16. Add your name using Condiment Font and colour #1c4b6f. Effects Plugins Eyecandy 4000 Gradient glow with settings below. Drop Shadow.
gradientglowsettings1darkness
gradientglowsettings2darkness

Thats it we are done. I hope you enjoyed my tutorial remember though this is only a guideline make the tag you're own.
Would love to see your results. If you would like to share them with me so i can add them please leave a message on here and send to my email addy fairygem1@gmail.com.
Hugs
Shaz/Fairygem

PTU Out on Safari PTU

Out on Safari
jenniferoutonsafari
This tutorial was written by me Shaz/Fairygem on the 12th April 2018 and is all my own idea and creation. Any resemblance to other tutorials is purely coincidental and not intended.

For this tutorial you will need:-
Paint Shop Pro - I am using X5 but any version will work.
Scrapkit - I am using a stunning new kit by Jennifer at Ginnibug Designz called Animal Safari. You can get this and many other wonderful kits from Hanias Design HERE
Tube of Choice - I am using an older tube by Alec Rud called Muriel. You can buy this tube at Picsfordesign HERE
Mask of Choice - I am using a wonderful mask by Babs at Bitzy Bee Designz called BBD_Mask 362. You can download this mask folder HERE.
Font of Choice - I am using a font called Ruthie. You can download this HERE
Plugins:-
Mura Miester - Clouds
Eyecandy 4000 - Gradient Glow
Drop shadow throughout tutorial - V2, H2, Opa 45, Blur 4.93, Black.
 Lets begin:-

1. New Image 650 x 650.
2. Open Paper 3. Copy and Paste as a new layer. Layers load Mask and find mask you are using:- Source Luminous, Fit to Canvas, Hide all Mask, Invert Transparency Checked. Delete Mask layer and merge group. Duplicate and merge down.
3. Open Frame 4. Copy and Paste moving slightly up. Magic Wand and click inside frame. Expand by 10.
4. Add a new layer and flood fill with #0b3259. Make this your foreground colour and change background colour to #decd4a.
5. Go to Effects Mura Miester Clouds with settings below. Do No Deselect.
muramiestersettingsoutonsafari
6. Open Element 4. Copy and Paste, Invert and delete overhanging. Selections None. Moved Flood fill layer and Element layer below frame. Add Drop Shadow to Element and Frame layers.
7. Open Element 18, Resize by 35% then 85%. Copy and Paste over to the right inside the frame. Drop Shadow.
8. Open Element 38, Resize by 45% then mirror. Copy and Paste moving over to the left inside the frame. Drop Shadow.
9. Open Element 61, Resize by 40%. Copy and Paste moving up to the top then left. Sharpen and Drop Shadow. With Eraser tool erase the overhanging goose.
10. Open your tube and if using the same as myself Resize by 40% then 85%. Copy and Paste moving slightly up. Drop Shadow.
11. Open Element 23, Resize by 85%. Copy and Paste moving slightly down. Drop Shadow. Move this layer under the tube layer.
12. Open Element 27. Copy and Paste moving over to the right and down slightly. Duplicate and Mirror moving over to the left. Merge down and Drop Shadow.
13. Open Element 8, Resize by 55%. Make the tube layer active. Copy and Paste Element and move down and over to the right. Duplicate and move over to the left. Merge down and Drop Shadow.
14. Open Element 16, Resize by 55%. Copy and Paste moving over to the left and slightly down. Drop Shadow.
15. Open Element 5, Resize by 55%. Copy and Paste moving over to the Right and down. Drop Shadow.
16. Open Element 21, Resize by 40% then 80%. Copy and Paste moving down and right. Duplicate and move over to the left. Merge down and Drop Shadow.
17. Open Element 30, Resize by 55%. Copy and Paste moving slightly down and right. Drop Shadow.
18. Open Element 68, Resize by 40%. Copy and Paste moving down and left. Drop Shadow.
19. Open Element 67, Resize by 20%. Copy and Paste moving down and left. Drop Shadow.
20. Add your Copyright and License Details.
21. Add your name using Ruthie Font and Colour #b22923. Plugins Eyecandy 4000 Gradient glow with settings below. Drop Shadow.
gradientglowsettings1outonsafari
gradientglowsettings2outonsafari

Save as a PNG.

Thats it we are done. I hope you found my tutorial easy to follow, remember though this is a guideline make the tag your own.
I would love to see your results and to show them off. If you would like to share please leave a message for me here and send your tags to fairygem1@gmail.com
Hugs
Shaz/Fairygem

Thursday 12 April 2018

Fairy Dust Magic

Fairy Dust Magic
This tag is made using a new Template set i  have made.
Also using Verymany artwork. The tube is called Fairy 4 and you can get it HERE along with more awesome tubes.
The kit i am using is by Pink Paradox Productions and is called Fairy Dust Dreams. You can get the kit HERE along loads more.
Heres my set
shazfdmav.png
shazfdmfs.png
shazfdmt.png

Here's the preview of the Templates themselves. They are saved in both Psp and Psd so can be opened in both programs.
Remember my terms of use though please. If used in a tutorial please send here for download and not for monetary gain.
Fairy Dust Magic Av template Preview.png
Fairy Dust Magic Forum Template Preview.png
Fairy Dust Magic Tag Template Preview.png
You can download them HERE
Hope you have fun 
Hugs
Shaz/Gem 

Tuesday 10 April 2018

Summer Dreamz Forum Set Templates

Summer Dreamz Forum Set Templates
Heres another template set for you all to play with
Hopefully you can find something to use that will go perfect with them. I am going to be using a kit again by Pink Paradox called Summer Dreams. You can find this kit and loads more HERE
I will be putting a preview of the set with the kit when i get a chance to properly play in Paint Shop Pro.
The template has been saved in both Psp and Psd so can be used by both programs.
Heres the preview of the set
summer dreamz av preview
summer dreamz forum template preview
summer dreamz tag template preview
You can download the set HERE
Remember though if used in a tutorial please send here for download and above all have fun 
Hugs
Shaz/Fairygem

Monday 9 April 2018

Hot in the City Template Set

Hot in the City Template
I was going through some of the kits i have and found an awesome kit by Pink Paradox called Light my Fire.
So i made this Template Set to have a play with and thought i would share it with you all just incase you can use it for anything too.
My Terms are as always if used in a tutorial send here to download and not for use with monetary gain.
Here is the preveiw
Hot in City Template AV
Hot in City Template FS
Hot in City Template TAG
They are saved in both Psp and Psd
You can download it HERE 

Have fun
Hugs
Shaz/Fairygem