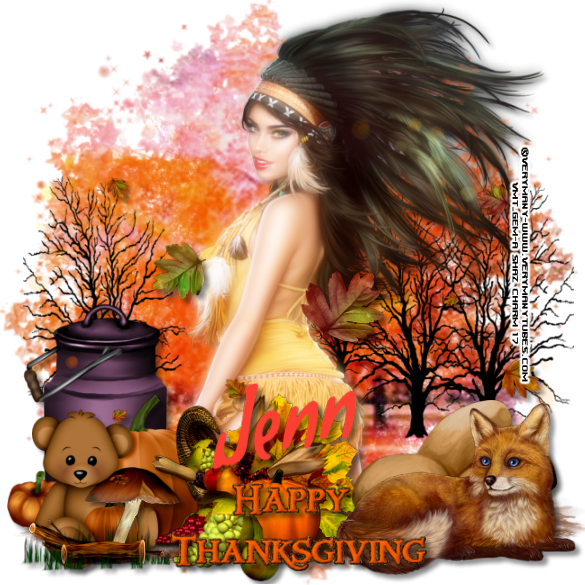
Little Indian


This tutorial was written by me Fairygem/Sharon on the 17th
November 2017 and is all my own idea and creation. Any resemblance to other
tutorials is purely coincidental and not intended. You will need to have a
working knowledge of Paint Shop Pro and working with layers.
For this tutorial you will need:-
Paint Shop Pro – I am using X5 but any version will work
Scrapkit – I am using a beautiful Thanksgiving kit by Jenn
at Ginnibug Designz called Indian. You can buy this kit at Hania’s Design HERE
or Picsfordesign HERE
Tube of Choice – I am using a gorgeous indian tube by
Verymany called Aiyana. You can buy this tube HERE. Remember though you need to
have a license to use Verymany’s tubes.
Mask of Choice – I am using a beautiful mask by Mizteeque
called Miz_Mask_195. You can get this mask and more from HERE
Font of Choice – I am using Condiment Regular which you can
get HERE
No outside plugins used.
Lets begin:-
1.
Open new image 650x650
transparent.
2.
Open Paper 15, resize
by 85%. Copy and paste as a new layer. Load Mask and find the mask you are
using. Delete mask layer and merge group.
3.
Open your tube, if
using the same as me resize by 55% then 75%. Copy and paste as a new layer.
Duplicate and on the copy go to adjust, Blur, Gaussian blur 6.00. Change the
blend mode to Screen. On the original give a drop shadow of H5, V5, Opa 44,
Blur 6.75 Black.
4.
Open Element 55. Copy
and paste as a new layer moving under the tube layer.
5.
Open Element 32. Copy
and paste as a new layer moving slightly right and down to the bottom of tube.
Duplicate and mirror. Merge Down.
6.
Open Element 78, resize
by 55%. Copy and Paste as a new layer moving left. D/s as above.
7.
Open Element 18, resize
by 35%. Copy and paste as a new layer moving left. D/s as above.
8.
Open Element 17, resize
by 55% then 75%. Copy and paste as a new layer moving down. D/s as above.
9.
Open Element 24, resize
by 55% then 75%. Copy and paste as a new layer moving right and slightly up.
D/s as above.
10.
Open Element 30, resize
by 45% and mirror. Copy and paste as a new layer moving right. Sharpen and D/s
as above.
11.
Open Element 6, resize
by 30%. Copy and paste as a new layer moving to far right of image. Sharpen and
D/s as above.
12.
Open Element 22. Copy
and paste as a new layer. Sharpen and D/s as above.
13.
Open Element 68, resize
by 55%. Copy and paste as a new layer moving down. D/s as above.
14.
Open Element 74. Copy
and paste as a new layer.
15.
Add your Copyright and
license details
16.
Add your name using
Condiment font and colour #fb4033. D/s as above.
Save as a png
That’s it we are done. I hope you enjoyed my tutorial and
found it easy to follow. Remember though this is just a guideline make the tag
your own.
Hugs

No comments:
Post a Comment