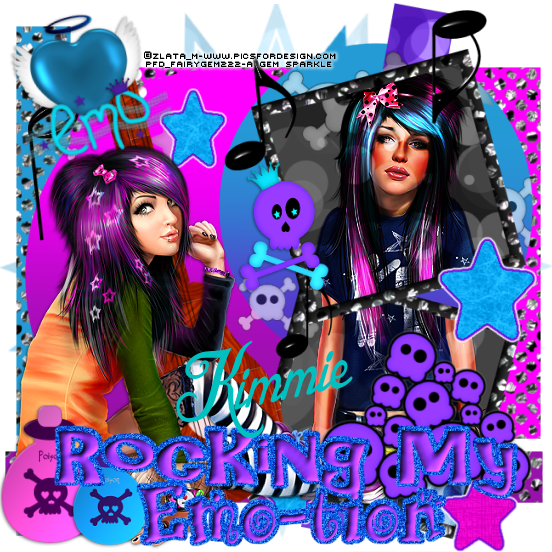
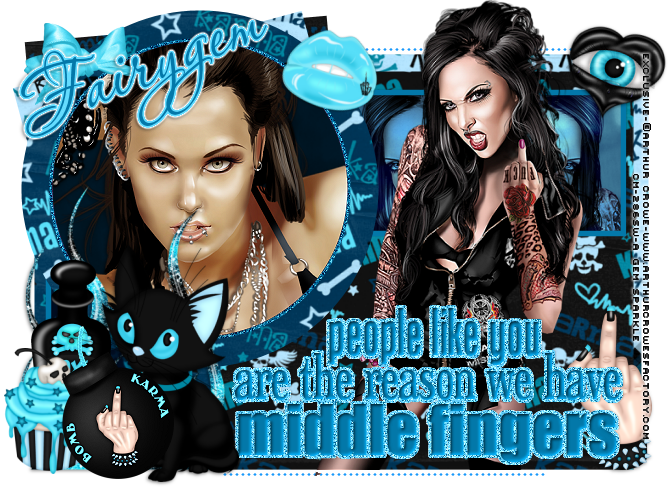
Pages

Wednesday 20 February 2013

Rocking My Emo-tion Template

Rocking My Emo-tion Template

This is the template to go with my new tutorial but again alot of people don't tut but would love the template so here it is. Preview Below

Rocking my emo-tion Template Preview

Download HERE
Remember to say thanks if you download it only takes a second but lasts a lifetime. 
Have fun 
Hugs
Gem xxx

Luck of the Irish Template

Luck of the Irish Template
I made this template to go with the tutorial underneath, but i know alot of people that would prefer the template to doing the actual tut so here it is. Preview Below
Luck of the Irish Template
You can Download HERE

Have fun and remember if you do download leave a wee thanks it only takes a second but lasts a lifetime
Hugs
Gem xxx

Luck of the Irish

Luck of the Irish
kimmieluckoftheirish

This tutorial was written by me Fairygem on the 19th February 2013. Any resemblance to another tutorial is purely coincidental and not intended. 
For this tutorial you will need to have a working knowledge of Paint Shop Pro and using layers. 

For this tutorial you will need:-
Paint Shop Pro -  I am using Psp9 but any version will work.
A tube of Choice - I am using the awesome art of Elias Chatzoudis, you need to have a license to use his art which you can find HERE
Scrapkit - I am using a new kit by Kimmie called St Patties which you can find HERE
My Template Luck of the Irish which you can find HERE
My Shamrock Mask which you can find HERE
Plugins :-
Eyecandy 4 - Glass
Eyecandy 4 - Gradient Glow
Xero - Fritillary
Font of Choice
Dropshadow settings throughout - 2, -2,50 and 5

Ok ready to begin Here goes

1. Open my Template Shift D and delete the original.

2. Open Paper 10, Resize by 85%, copy and paste at the bottom of the layers. Layers Load/Save mask and find my shamrock mask. Load the mask. Delete mask layer and merge group.

3. Highlight the Splat Layer, Select float, defloat. Add a new layer and flood fill with #41994d. Selections none and delete the original layer. 

4. Staying on the Splat layer, Effects Xero Fritillary with the settings below
fritillary settings


5. Highlight the tilted rectangle layer, Select float, defloat. Open Paper 9 and resize by 85% twice. Copy and Paste as a new layer, Invert and Delete. Delete the original layer. 

6. Highlight the Long rectangle layer, select float, defloat. Open Paper 5 and resize by 85% then 90%. Copy and paste as a new layer, Invert and Delete. Delete the original layer. 

7. Highlight the Small rectangle layer, Select float, defloat. Open Paper 4 and resize by 85% twice. Copy and paste as a new layer, Invert and Delete. Delete the original layer. 

8. Highlight the Rounded Square layer, Select float, Defloat. Open Paper 7 and resize by 90% twice. Copy and paste as a new layer, Invert and Delete. Delete the original layer. 

9. Highlight the Small Circle layer, Select float, Defloat. Open paper 2 and resize by 90% twice. Copy and paste as a new layer, Invert and Delete. Delete the original layer. 

10. Highlight the Large Circle layer, Select float, Defloat. Open paper 1 and resize by 90% twice. Copy and paste as a new layer, Invert and Delete. Delete the original layer. 

11.  Highlight the Square Background, Select float, Defloat. Open paper 6 and resize by 90% twice. Copy and paste as a new layer, Invert and Delete. Delete the original layer. 

12. Highlight the Frame layer, Select float, Defloat. Add a new layer and floodfill with #4cfc65. Adjust Add/Remove noise Random Monochrome ticked and 80%. Do not deselect.

13. Take your tube Copy and Paste as  a new layer. Grab your eraser tool and rub out the overhanging part of your tube at the bottom of the frame. Add a dropshadow settings at start of tut. 

14. Add a dropshadow to your frame layer. 

15. Highlight your Shamrock layer, Effects Eyecandy Glass and use the settings below. Effects Eyecandy Gradient Glow using settings below.
glass settings

Gradient glow settings 1
Gradient glow settings 2

16. Highlight the Thin Rectangles layer, Select float, Defloat and add a new layer. Floodfill with #131f12. Effects Fritillary using settings previously used.

17. Highlight the Background wordart. I kept the colour as it was but you can change it to your own liking if you so wish. Add Noise settings Random Monochrome ticked 80%.

18. Highlight the Wordart, Select float, Defloat and add a new layer. Floodfill with #619652. Effects Eyecandy Glass using settings previously used. 

19. Open Element 4 and resize by 45%. Copy and paste under the wordart but above the rectangles and make it look as though the rainbow is going through your tube. 

20. Open Element 9 and resize by 45% twice then 70%. Copy and Paste as a new layer placing it to the right of your tube. 

21.  Open element 5 and Resize by 20% then 55%. Copy and Paste as a new layer placing next to the pot of gold. Rotate by 14% to the left. 

22. Open Element 6 and Resize by 20% then 55%. Copy and paste as a new layer placing next to element 5. Rotate by 14% to the right. 

23. Open Element 12 and Resize by 35%. Copy and paste as a new layer, placing it at the bottom of the thin rectangles. Duplicate and mirror. Merge down and give a dropshadow. 

24. Open element 24 and resize by 35%. Copy and paste as a new layer placing it at the top of the left side. Sharpen and give a dropshadow.

25. Open element 27 and resize by 20% then 45%. Mirror then Copy and paste as a new layer placing it next to the glass we added earlier. Add a dropshadow.

26. Open Element 31 and resize by 15%. Copy and paste placing at the top left hand side. Sharpen and give a dropshadow.

27. Add your name placing it above the rectangles.

28 Add your copyright and correct licenses then save as a png.

Thats it we're done hope you had fun don't forget my tutorial is only a guideline make the tag your own. 
Hugs
Gem xxxx


Tuesday 19 February 2013

Rocking Emo-tion

Rocking Emo-tion

kimmietag

Welcome to my new Tutorial. I am writing this after becoming a CT for Kimmie. This is using one of her new kits. 
I wrote this tutorial on the 19th February 2013 and is all my own idea, any resemblance to another tutorial is purely coincidental and not intended. You will need to have a working knowledge of Paint shop pro and using layers. 

For this tutorial you will need:-

Paint shop pro - I am using Psp9 but any version will work.

Tubes of choice - i am using Emo Dreams and Gloria by Zlata_M which you can get at Pics for Design HERE

Scrapkit by the wonderful Kimmie called Emo Rocks which you can get HERE

Template - Made by Me called Rocking My Emo-tions which you can download HERE

Mask of Choice or the one i am using by Vix mask 151 which you can get HERE

Font of Choice or the one i am using called Blessed Day which you can get HERE

Plugins used:-
Eyecandy 4 - Gradient Glow
Filters Unlimited - Paper Texture - Fibrous Paper - Course
and Papyrus.
Ok are you ready, then lets begin
Drop Shadow throughout the tutorial 1, -1, 50 and 5

1. Open my template, Shift D and delete the original. Delete the TOU.

2. Open Paper 11 from Kimmies Kit, Resize by 75%. Copy and paste as a new layer at the bottom of the template.

2. Layers load mask and load Vix Mask 151. Delete the mask layer in your palette then merge group. 

3. Highlight the rectangle layer, select float, defloat. Open Paper 4 and resize by 80%, Copy and paste as a new layer, Invert and delete. Delete the original layer. 

4. Highlight the Upright Strip, select float, defloat. Open Paper 5 and resize by 80%, Copy and Paste as a new layer, Invert and Delete. Delete the original layer. 

5. Highlight the Longways strip, select float, defloat. Open Paper 3, resize by 80%. Copy and paste as a new layer, Invert and Delete. Delete the original layer. 

6. Highlight the Big Circle, Select float, defloat. Open Paper 2 and resize by 80%. Copy and Paste as a new layer, Invert and Delete. Delete the original layer.

7. Highlight the Small Circle, Select float, defloat. Open Paper 1 and resize by 80%. Copy and paste as a new layer, Invert and Delete. Delete the original layer. 

8. Highlight the Leaning Strip, Select float, defloat. Open Paper 9 and resize by 80%. Copy and Paste as a new layer, Invert and Delete. Delete the original layer.

9. Highlight Bottom Square, Select float, defloat. Open Paper 8 and resize by 80%. Copy and paste as a new layer, Invert and Delete. Don't delete the original yet we are going to need it in a moment. 

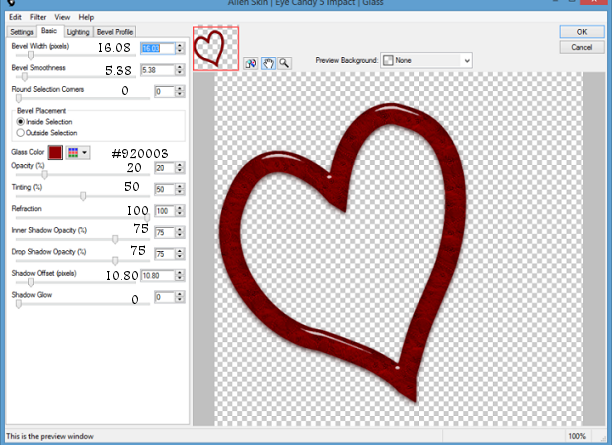
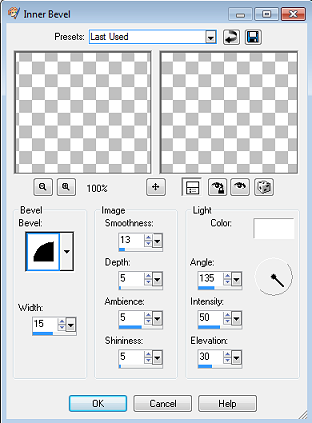
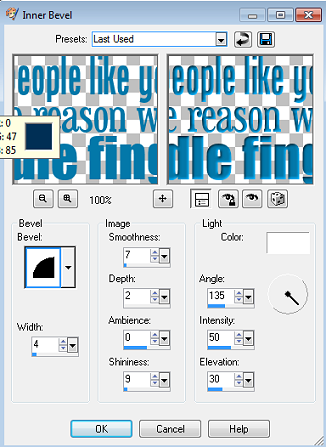
10. Highlight Bottom Frame, Select float, defloat. Open Paper 7 and resize by 80%. Copy and paste as a new layer, Invert and Delete. Delete the original layer. Effects inner bevel using the settings below 
Inner bevel settings

11. Highlight the Top Square, Select float, defloat. Open paper 8 and resize by 80%. Copy and paste as a new layer, Invert and Delete. Don't delete the original layer yet. 

12. Take your magic wand and Highlight the bottom square and the top square, once you've got the marching ants copy your tube that you are going to use and paste as a new layer where the marching ants are. Invert and Delete making sure you go to both layers. Change the blendmode to Hard light.

13. Highlight the Top Frame, select float, defloat. Open paper 7 and resize by 80%. Copy and paste as a new layer, Invert and Delete. Delete the original layer. Effects, inner bevel and use the settings we previously used. Delete the original layer.

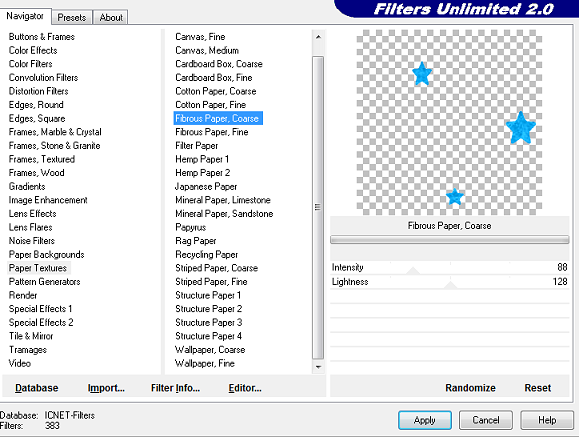
14. Highlight the Stars Layer. Taking your magic wand click on 3 of your stars. Add a new layer and flood fill with #0cabf4. Deselect and go to Effects, Plugins Filters unlimited Paper Textures, Fibrous Coase using settings below.
Filters unlimited Settings1


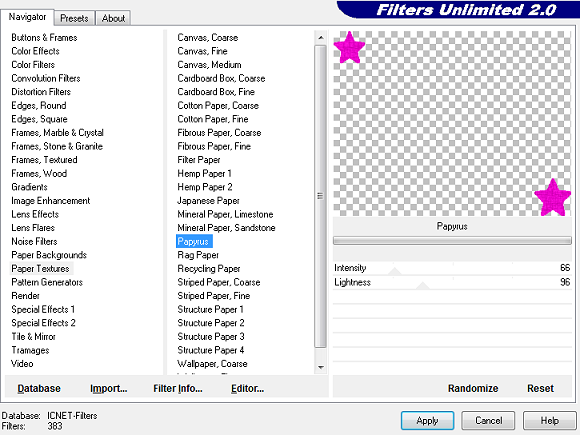
15. Highlight the Star layer again. Taking your magic want click on the last two stars. Add a new layer and flood fill with #ec04ce. Deselect and go to Effects, Plugins Filters unlimited Paper Texturs, Papyrus with the settings below. Delete the original star layer and merge your two Star palettes together. 
filters unlimited settings 2

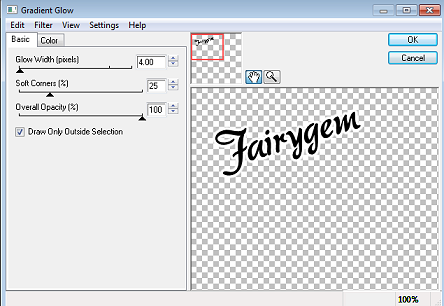
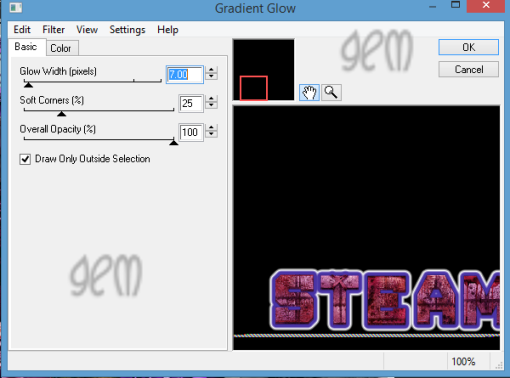
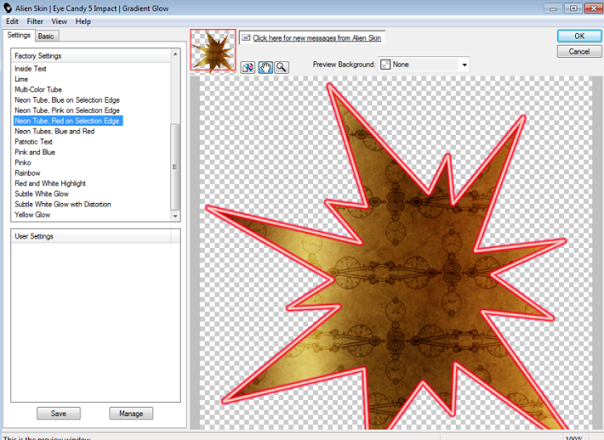
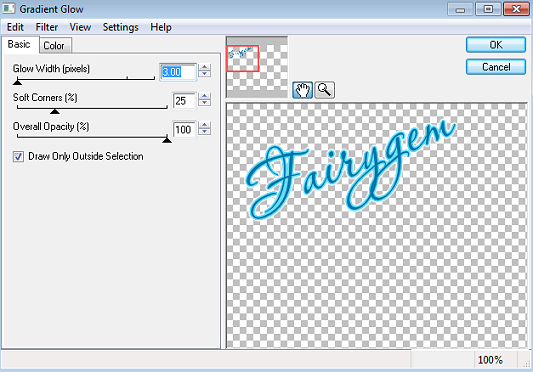
16. Staying on the Stars layer, Effects Eye Candy 4, Gradient Glow with the settings below. 
Gradient Glow settings 1
gradient glow settings 2

18. Highlight the Wordart Background, Select float, defloat. Modify Expand by 2. Add a new layer and flood fill with #0461ec. Delete the original layer.

19. Staying on the Wordart background, go to Adjust Add/Remove noise Random, monochrome ticked 65%.

20. Highlight the Word art, select float, defloat. Add a new layer and flood fill with #9438fc. Deselect, Effects Inner Bevel with the settings we used previously. 

21. Copy and paste your tube as a new layer, resize if needed and place in at the bottom on the left side under the wordart. Add a dropshadow.

22. Open element 5. Resize by 30% twice, copy and paste as a new layer placing at the top left corner. Add a dropshadow.

23. Open element 51 and resize by 30% then 40%. Copy and paste as a new layer placing at the bottom left side see my tag for placement. Image rotate free rotate 15%. Add a dropshadow.

24. Open element 50 and resize by 30% twice. Copy and paste as a new layer placing next to element 51. Add a dropshadow.

25. Open element 29 and resize by 30% then 85%. Copy and paste as a new layer placing to the right side under the wordart. Add a dropshadow.

26. Open element 17 and resize by 30% twice. Copy and paste as a new layer placing under element 5. Image rotate free rotate 15%. Add a drop shadow.

27. Open element 9 and resize by 30% twice. Copy and paste as a new layer placing in the middle of the top frame. Add a drop shadow.

28. Resize the whole tag by 85%. Don't forget to Sharpen your tube etc as it goes a wee bit blurry when resizing. 

29. Add your Copyright and license if needed.

30. Add your name using the font then save as a png.

Thats it we're done hope you enjoy my tut and found it easy enough to follow. 

Any questions leave me a message.
Hugs to all 
Gem xxx


Saturday 9 February 2013

FCUK Karma

FCUK Karma
fairygemtag
I'm not a big swearer but when i saw this template and kit from Minxy and Kirstin they just go together and i had to tut it lol. 
The Scrapkit is part of a collab with Kristin, Justine and Mel and the colours are so vibrant it just tells you to make a tag. 
I wrote this on the 8th Feb 2013 and is all my own idea, any resemblance to another tutorial is purely coincidental and not intended.

For this tutorial you will need:-
Paint shop pro - I am using Psp9 but any version will work
Two tubes of choice, Mine are exclusives by Arthur Crowe for Creative Misfits HERE
Scrapkit by Kristin, Mel and Justine its called Karma which you can find the start of HERE
Template 385 by Missy over at Divine Intentionz you can get the template HERE
Font of Choice - I am using Aquarelle which you can find HERE
Plugins :- Eye candy 4 Gradient Glow

Ok lets begin.

1. Open your Template shift d and close the original. 

2. Raster 2 on template, selections float defloat. Open Paper 10 by Kristin and resize by 75%, copy and paste as a new layer, Invert delete and delete your original layer.

3. Raster 1 on the template, selections float, defloat. Open Paper 4 by Kristin and resize by 75%, copy and paste as a new layer, Invert and delete. Delete your original layer.

4. Rectangle 1, selections float, defloat. Open Paper 11 by Kristin and resize by 85%, copy and paste as a new layer, Invert and Delete. Delete the original layer.

5. Rectangle 2, Selections float, defloat. Open Paper 6 by Kristin and resize by 85%, copy and paste as a new layer, Invert and Delete. Delete the original layer. 

6. Rectangle 3, Selections float, defloat. Open Paper 9 by Kristin and resize by 85%, copy and paste as a new layer, Invert and Delete. Delete the original layer.

7. Square, Selections float, defloat. Open Paper 5 by Kristin and resize by 85%, copy and paste as a new layer, Invert and Delete. Delete the original layer. 

8. Small Squares, Selections float, defloat. Open Paper 7 by Mel and resize by 90%, copy and paste as a new layer, Invert and Delete. Delete the original layer. Do not deselect. 

9. Take one of your tubes, copy and paste as a new layer into the left sqaure, don't worry if some of the tube goes into the right square we can erase that when we deselect. Delete and deselect. Erase any part thats in the right square. Now copy and mirror your tube and place it in the right side of the squares. Merge the two together then change the blendmode to Overlay.

10. Copy of small squares, Selection float defloat. Open Paper 8 by Mel and resize by 90%, copy and paste as a new layer, Invert and Delete. Delete the original layer. 

11. Merge down the dotted lines, Add a new layer and flood fill with #1999fb. Back to the dotted lines, Selections float, defloat then back to your flood filled layer, Invert and delete. Delete the dotted lines.

12. Move the Small squares shadow next to each other then merge down. Do the same with the Small squares frame.

13. Small Squares frame, Selections float defloat add a new layer and flood fill with #0378a9. Delete the original layer. 

14. Circle, Selections float, defloat. Open Paper 1 by Kristin, copy and paste as a new layer, Invert and Delete. Delete the original layer. 

15. Circle2 back, Selections float, defloat. Add a new layer and floodfill with #0378a9. Deselect and delete the original layer.  Adjust Add/Remove noise Random 65% Monochrome Checked. 

16. Circle 2, Selections float, defloat. Open Paper 6 by Mel, copy and paste as a new layer, Invert and Delete. Delete the original layer. Do no Deselect.

17. Copy your other tube and paste as a new layer in the center of the circle. Delete any hanging over. Deselect.

18. Wordart Background, Selections, float and defloat. Add a new layer and floodfill with #65d0fd. Delete the original layer. Adjust Add/Remove noise and use the settings we used previously. 

19. Wordart, Selections float, defloat. Add a new layer and floodfill with #0378a9. Delete the original layer. Add an Inner Bevel settings below. 
Inner Bevel settings

20. Copy and Paste your main tube and place it on the right hand side below the wordart. If using the same one as me resize by 55%. Sharpen the tube after you have resized. 

21. Open Elements from Kristins kit,
Bomb
Bottle
Bow3
Crying Eye
Cupcake
Flame
Cat 
Lips.
Resize the Elements to fit into your tag and place where you wish to put them, see my tag for references but try and make it your own. When you are resizing the elements sharpen before pasting onto the working layers.

22. Add a dropshadow of 1,-1,50 and 5 to all the elements and your tubes. 

23. Add your copyright with proper credits and licenses.

24. Find your Aquarelle font and write out your name using the colour #0378a9. Then add a gradient glow settings below. Add a dropshadow
gradient glow1
gradient glow 2

25. Save your work as a png 

Thats it we're done hope you found my tutorial fun and easy to follow. Remember if you have any questions feel free to message me. 

Hugs
Gem xxx

Friday 1 February 2013

Love Is Template

Love is Template

Thought i better make a template for Valentine rather than against as i love the holiday aswell. 
This one is called Love is 
Preview below
Love is Template

Download HERE
Remember and leave some love it only takes a second but lasts a lifetime
Hugs
Gem xxx